Welcome To Echo Service
The web app is designed to streamline your estimates and field service operations. With the Echo Service platform, you can efficiently manage job requests, create estimates, generate invoices, handle purchase quotations, and much more. All from a single, easy-to-use interface. Say goodbye to juggling multiple tools.
Getting Started
To begin using Echo Service, visit our website and create an account. After signing up and subscribing, you’ll go through a quick setup process where you can configure your company settings, import customer data, and create accounts for your team members, all from the main dashboard.
We also offer a free trial website that you can access anytime, anywhere. It’s a great way to explore our features and get a feel for how everything works. Just click “Access Trial” in the navigation bar and log in. no payment or credit card required
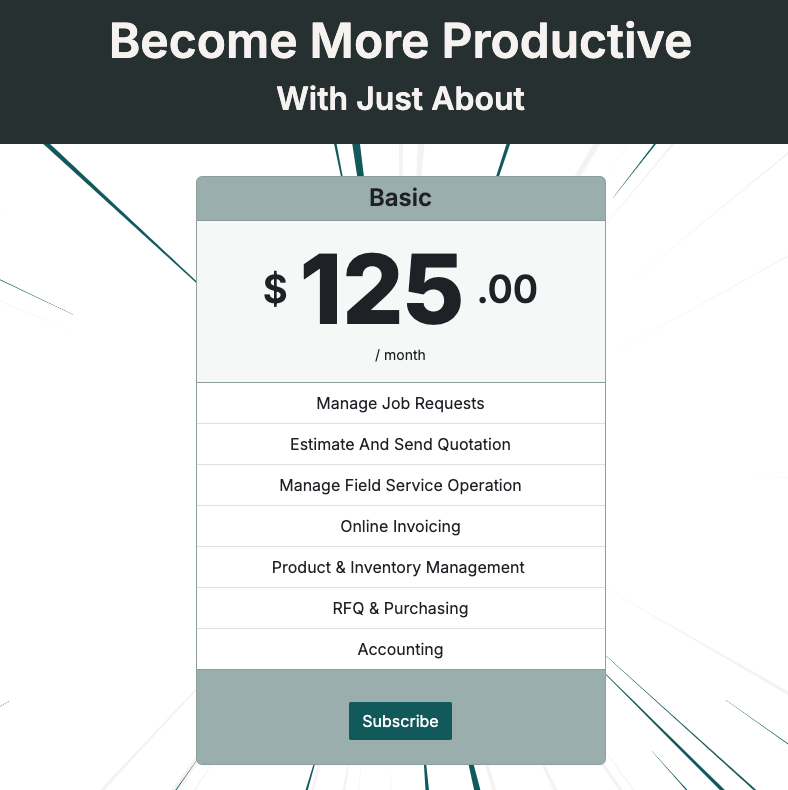
To subscribe, click the product card available on the homepage of our website.
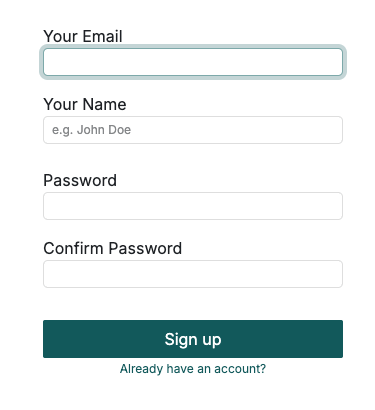
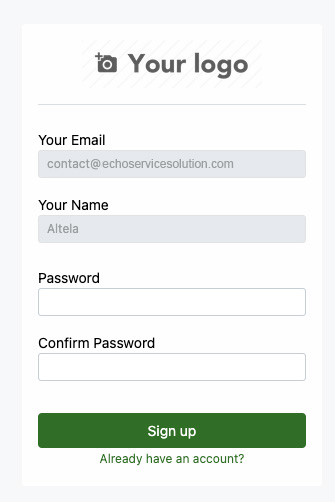
During registration, fill in your information by providing your email, name, and password.
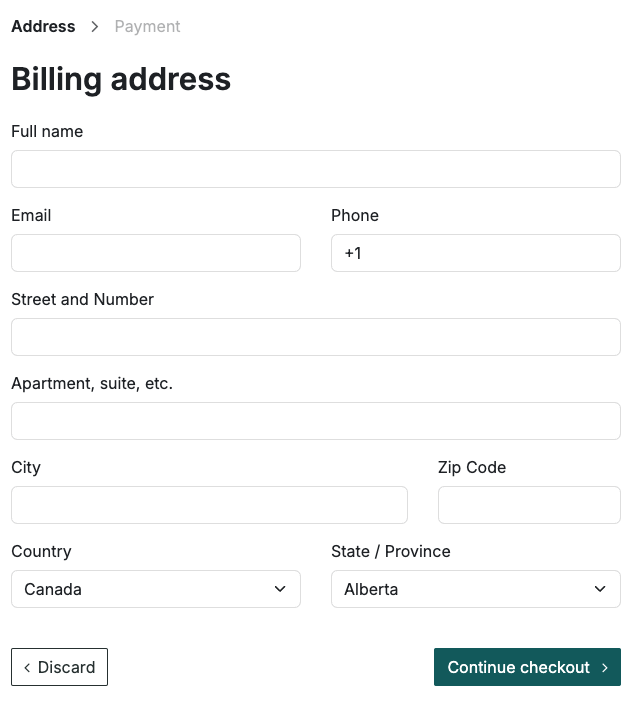
After that, you’ll be redirected to the Address page. Enter your address here for payment purposes.
You can add your payment method using your credit or debit card information. All transactions are securely processed through Stripe, our trusted third-party payment provider, to ensure your data stays safe.
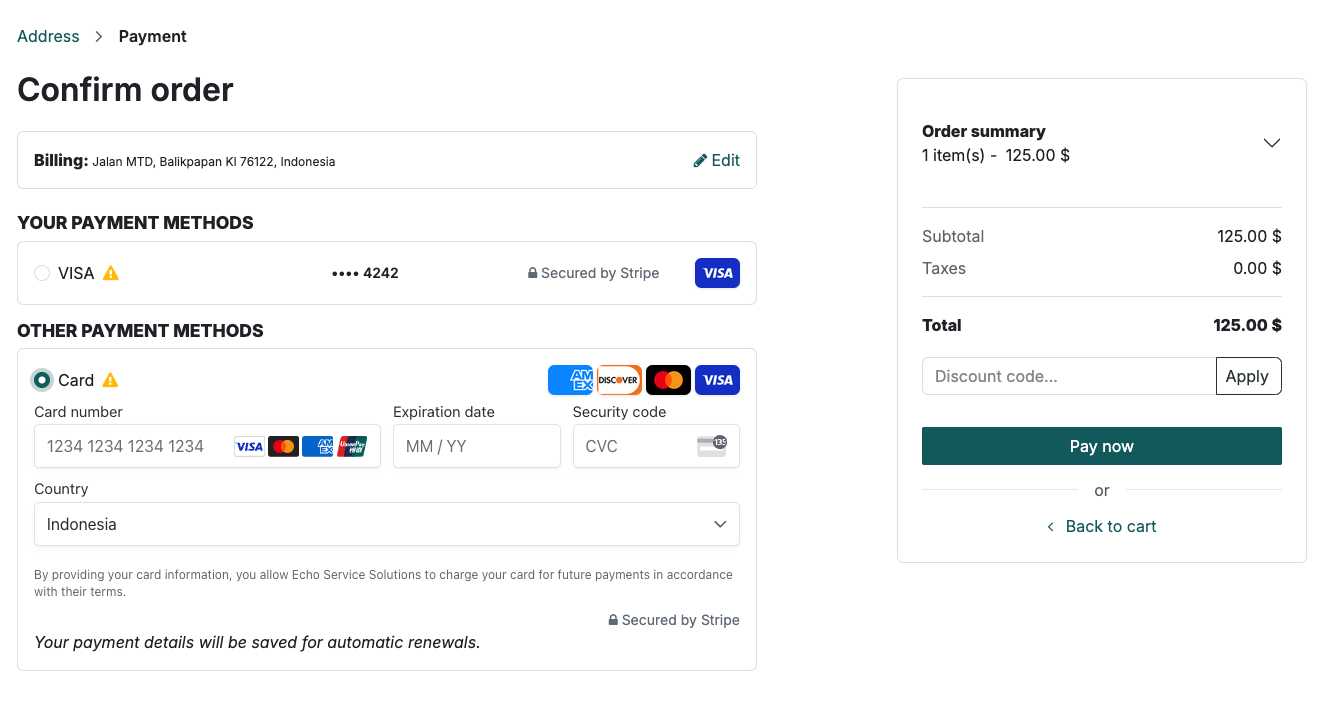
It may take a little while to validate your payment. Once it’s complete, you’ll see a confirmation that your payment was successful. You’ll also see a button that will take you to your new website.
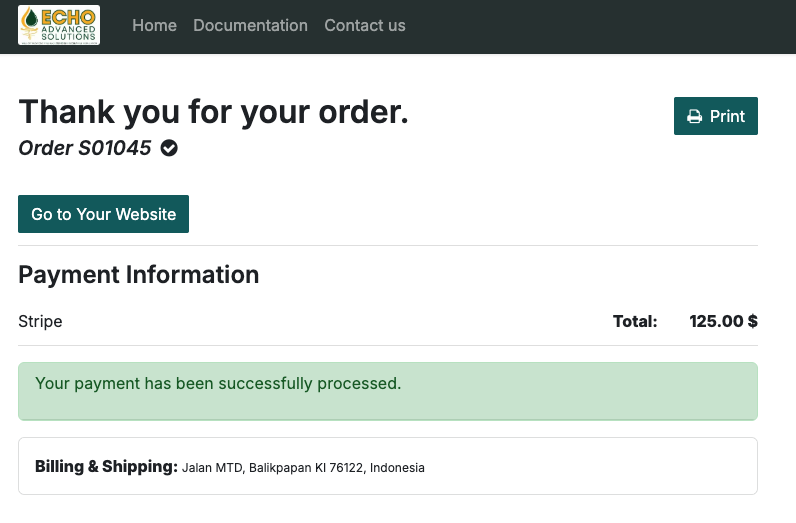
After clicking “Go to Your Website”, a new tab will open, and you’ll be asked to set up a new password. This password is for your website and is different from your portal account password.
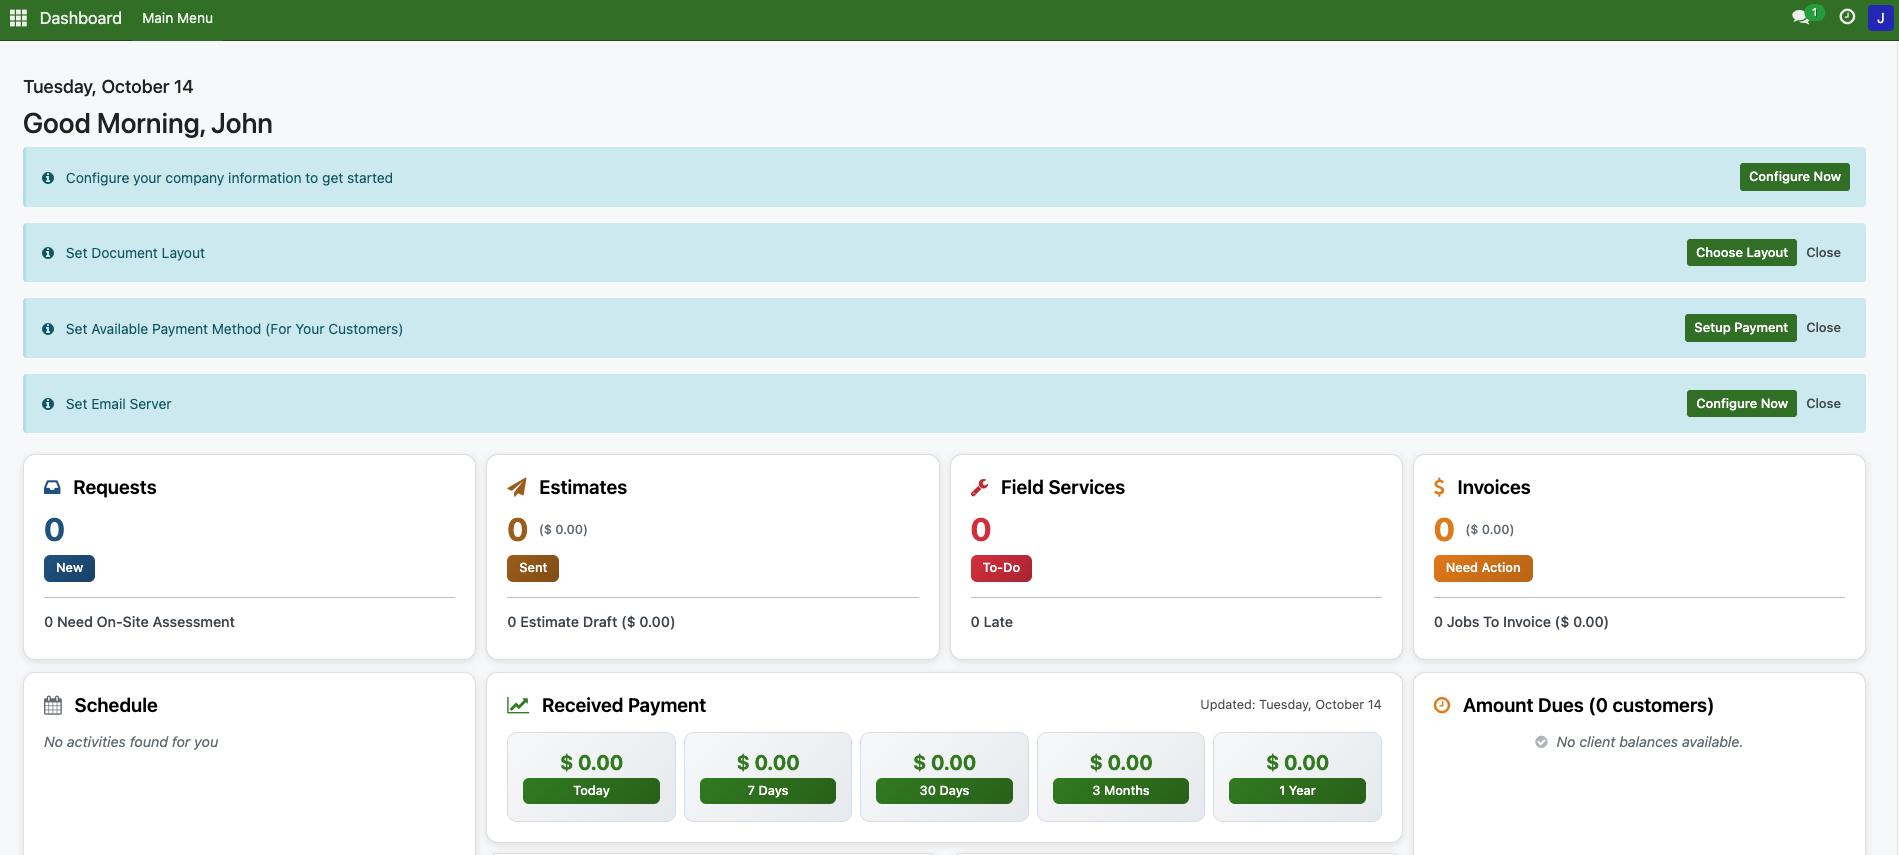
After signing up and logging in, you’ll be redirected to the main dashboard. Congratulations, and welcome aboard!
Onboarding
Once you're successfully managed to register and log in, the very first best thing is setting up your app.
This is your website’s dashboard. From here, you can monitor all your projects and estimates, manage field services, and keep track of inventory items that need your attention.

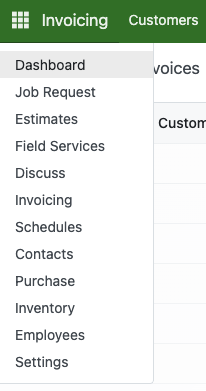
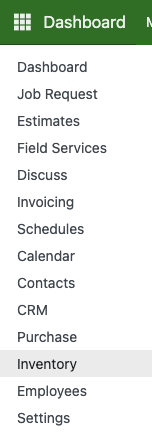
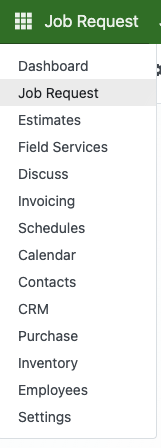
On the top left of the screen, you’ll see a box icon that you can click.
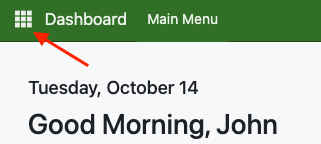
When clicked, it will show all of the available navigation menu.
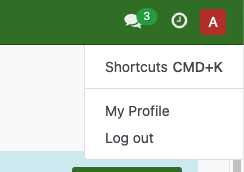
On the top-right, theres also a profile and logout button.
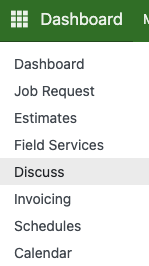
Our platform includes a real-time chat feature that lets everyone communicate directly or within channels. To access the chat interface, go to Menu > Discuss.
On the left panel, you can create channels and invite people to collaborate, or send direct messages to anyone on the platform. Chats will appear in the main panel on the middle-right side of the screen.
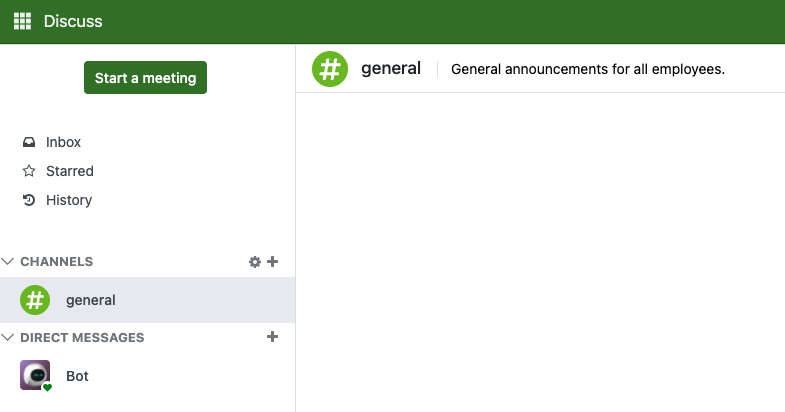
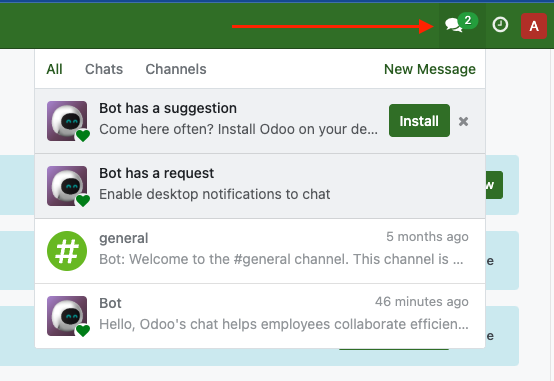
For quicker access, you can also open the chat from the top-right corner of the screen. Click the conversation bubble icon to view your latest messages.
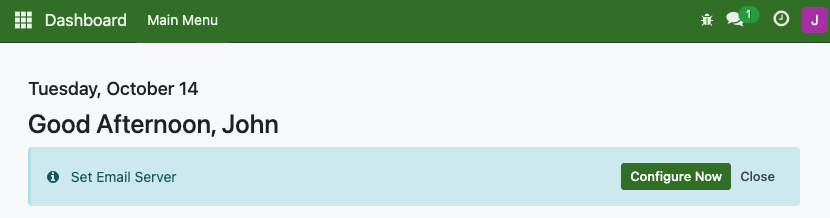
From the main dashboard, you’ll see a blue banner prompting you to set up your company. Click Configure Now to begin.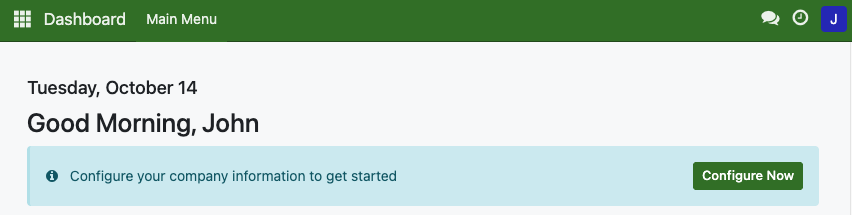
Fill the information of your company, along with the brand image or logo.
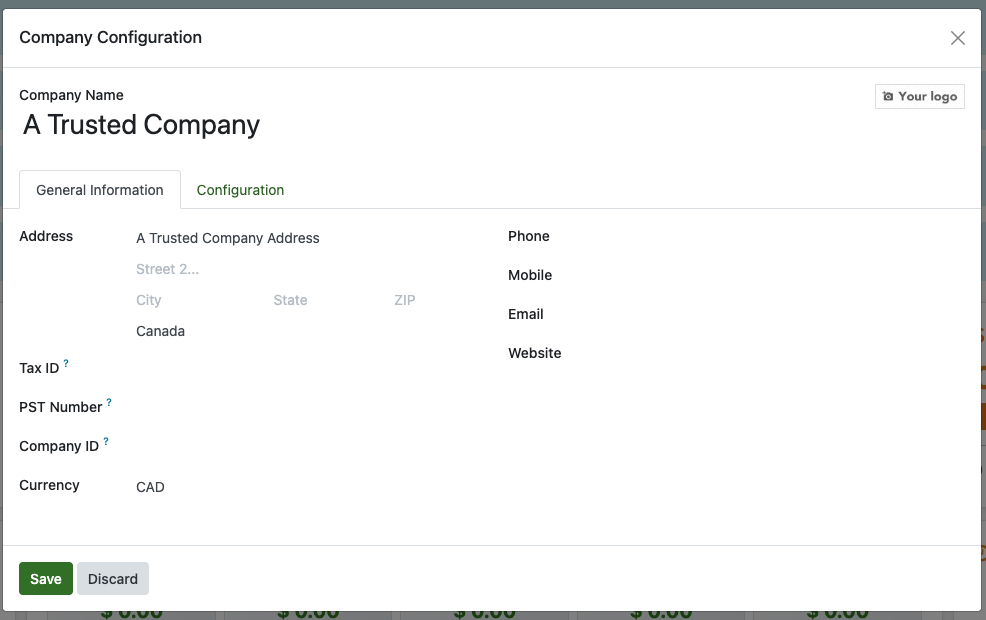
Also fill the Configuration tab based on your requirements
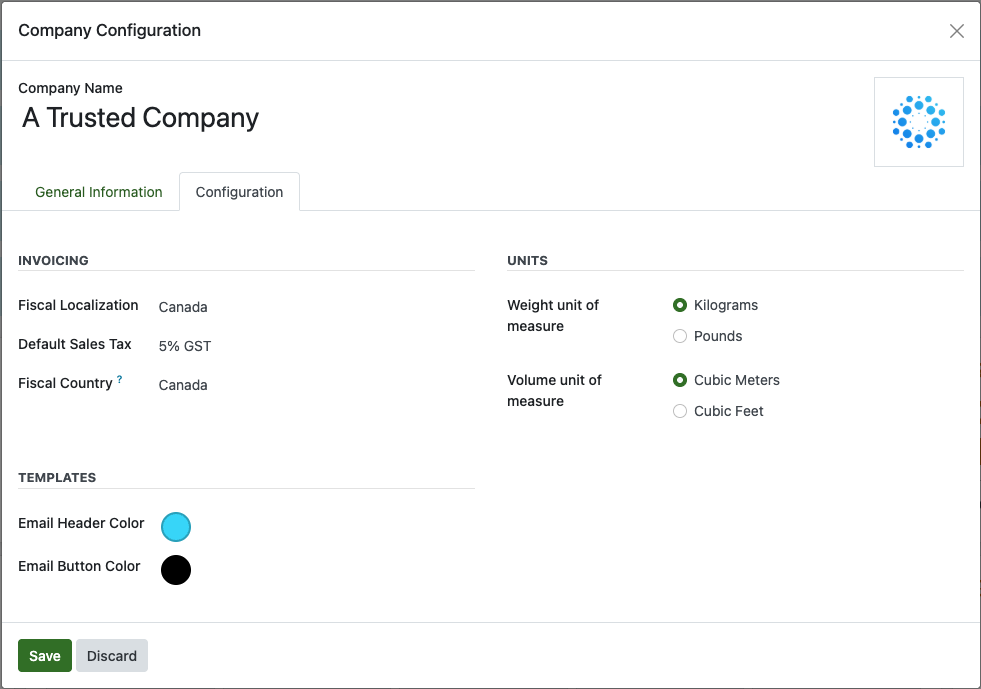
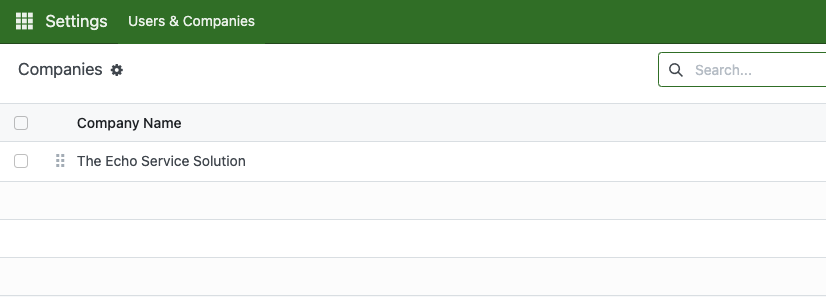
You can click Save button to apply changes. The Company information still can be re-accessed again in Menu > Settings > User & Companies > Companies.
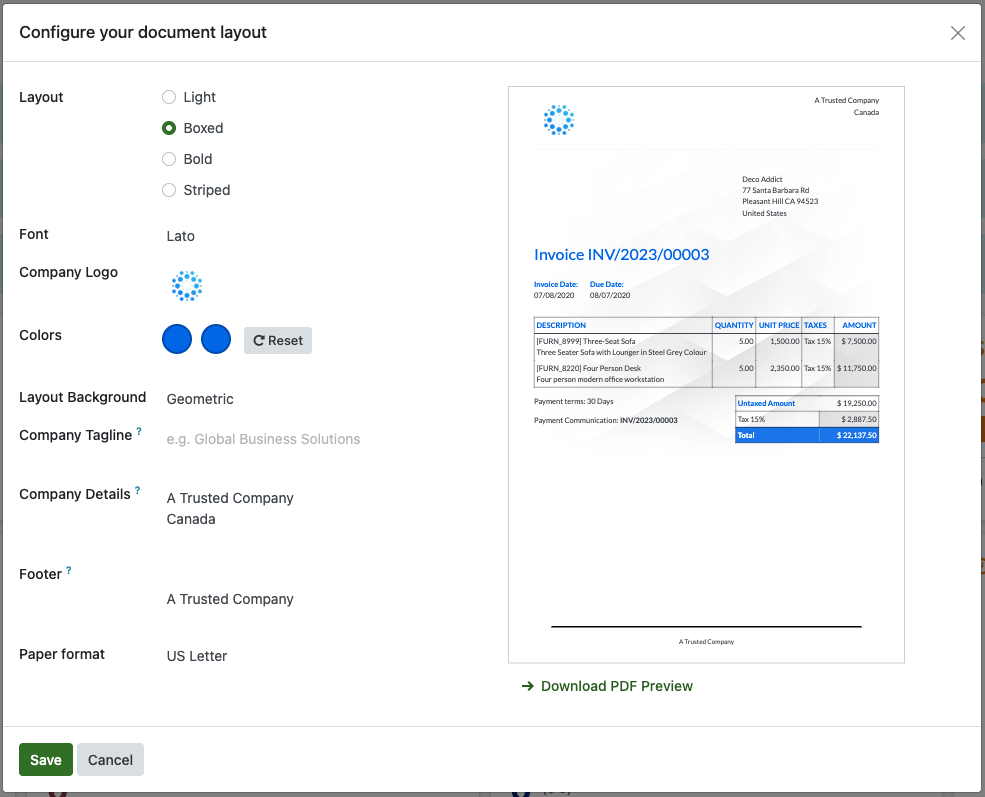
From dashboard, click Choose Layout to pick available layout for document and reporting.
Customize it as much as you need.
Our platform currently can be integrates with the Stripe payment gateway, allowing your customers to pay their invoices online using a credit or debit card. When using Stripe, all payments go directly to your Stripe account until you choose to withdraw the funds to your bank account. We do not hold or manage any of your money. All transactions are processed securely and go straight to your Stripe account.
From the dashboard, click Setup Payment and you will see all of our available payment method.

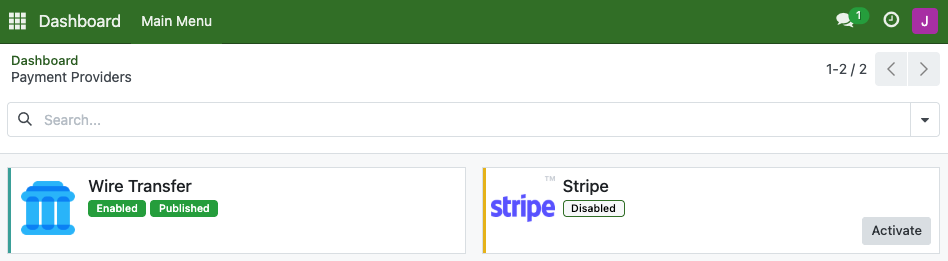
To activate Stripe, register at stripe.com and complete all the required information. Once your account is set up, you’ll receive a long, unique code called an API Key. This key is essential as it connects your website to the Stripe payment system when customers pay their invoices.
Keep your API key strictly confidential and never share it with anyone outside your organization.
Stripe provides two API keys: a Publishable Key and a Secret Key.
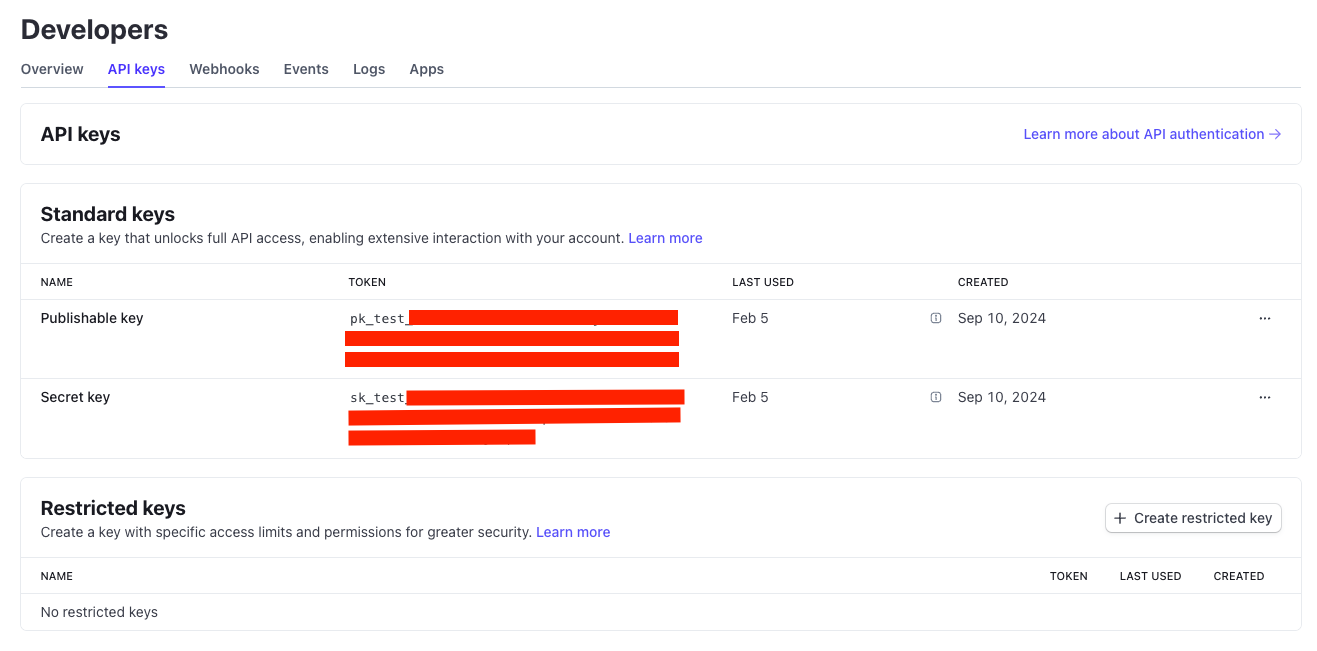
Copy each key into its corresponding Stripe text field. After that, click Generate Your Webhook. Once clicked, the Webhook Signing Secret field will be automatically filled. We will have three fields that now should be filled as image below.
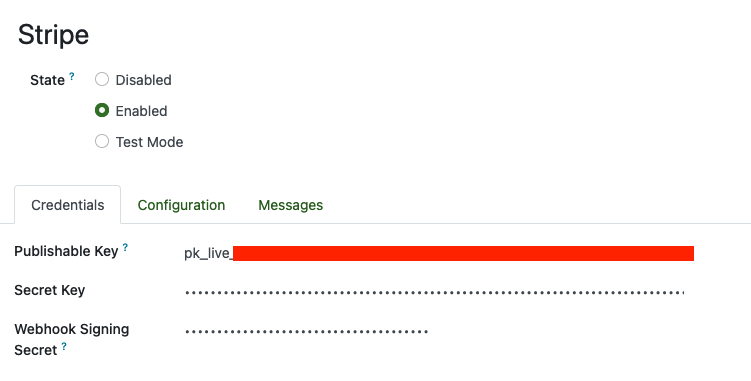
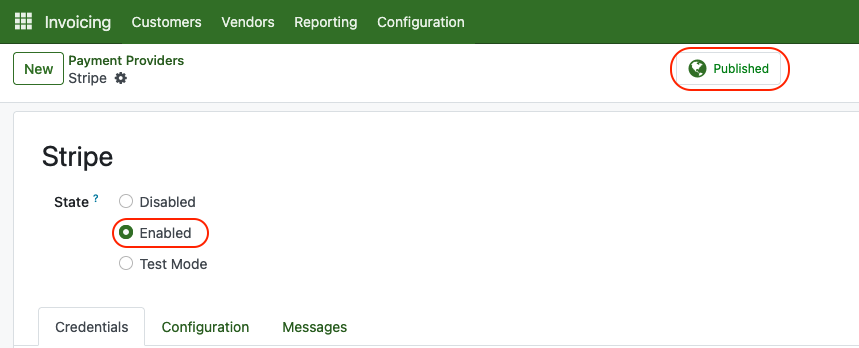
Lastly, make sure the state is Enabled and Published and we are good to go.
Outgoing Mail is a feature that allows you sending emails from our platform using your credentials. In short, you can send emails using Gmail or Microsoft Outlook account from our platform. By doing that, click on Set Email Server from the dashboard. You can access this feature in Settings > Company > Outgoing Mail Server too.
Create a new record. If you are using postechpiles.com domain in your email address, you can follow this setup below :
Name : your email address ([email protected])
FROM filtering : your email address ([email protected])
Authenticate With : Username
Connection Encryption : TLS (STARTTLS)
SMTP Server : mail.smtp2go.com
SMTP Port : 587
Username : Your email username
Password : Your email password
Once you done, click test connection. If connection successful, pop up will appear on the top right of the screen.

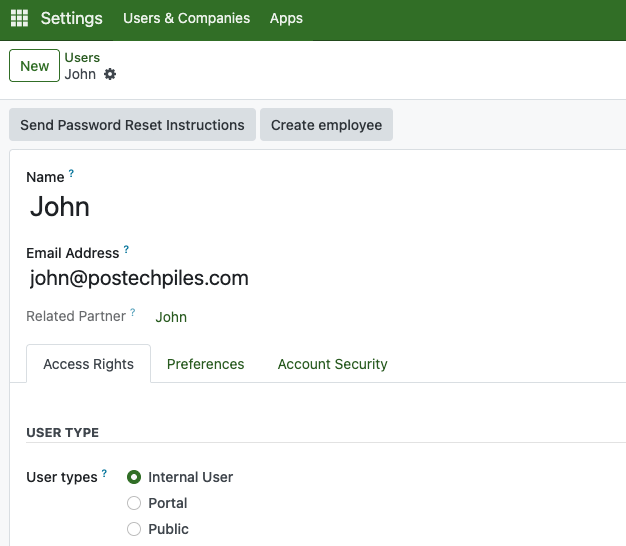
Now, don't forget to assign this email into the right user. Go to settings > User > Select user. Then, add the email.
Managing Users
Terms "Users" is you, your team, and everyone that can manage all records and information.
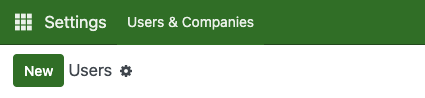
Go to Settings > User & Companies > Users > New
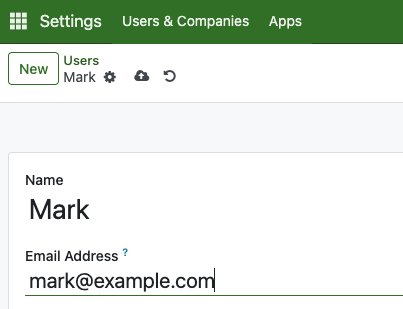
Create new user by typing their name and email
You can set initial password for them as well from this cog icon besides their name. Its recommended for them later to change their password after initial log in.

From the selected user view, scroll down to see all the available roles that can be assigned to the user. The Administrator role has the highest level of access and allows the user to manage all records.

Website Domain
After subscribing, you’ll receive your website address (for example: dealer9997478.echoservicesolution.com). Using our subdomain is free and does not incur any domain costs. However, if you’d like to use a custom domain based on your business name, an additional yearly fee will apply depending on the top-level domain you choose (such as .com, .net, .ca, .us, and others).
Currently, the option to change your domain is not available directly from your website. To request a domain change, please contact us via email and include your desired domain name (for example, example.com) and your current domain (dealer9997478.echoservicesolution.com).
Workflow
Managing Inventory
With our platform, you can manage your products by tracking stock quantities and maintaining detailed product information.
A Product Category works like a rack in a retail store — it helps you organize products by type for better management.
To create one, go to Inventory > Product Categories and click New, then enter the name of the category.

Next, you’ll need to set the costing method for inventory valuation. This determines how the value of each product and your total stock is calculated. You can choose between Standard Price, FIFO, or AVCO. For simplicity, we recommend using Standard Price.
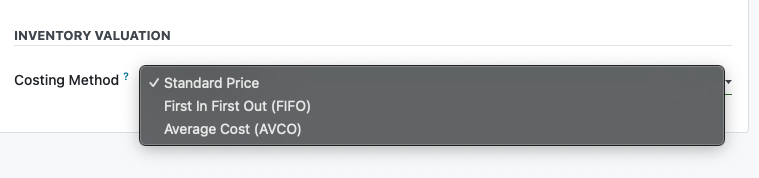
Standard Cost:
- Fixed cost set manually
- Variances tracked separately
- Ideal for stable-cost products
- Simple accounting, but requires regular updates
FIFO (First In, First Out):
- Products valued at actual purchase cost
- Oldest stock sold first
- Detailed tracking of each lot
- Accurate but higher computational overhead
AVCO (Average Cost) :
- Cost calculated as running average
- New purchases update average
- Formula: (Existing Stock × Current Cost + New Stock × Purchase Cost) ÷ Total Quantity
- Balance between accuracy and simplicity
Once it done, click save.
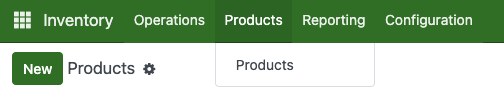
To create product, access inventory from the main menu by clicking on Inventory.
Go to products and click new.
Input all the product information here. Also don't forget to put correct product category into each product.
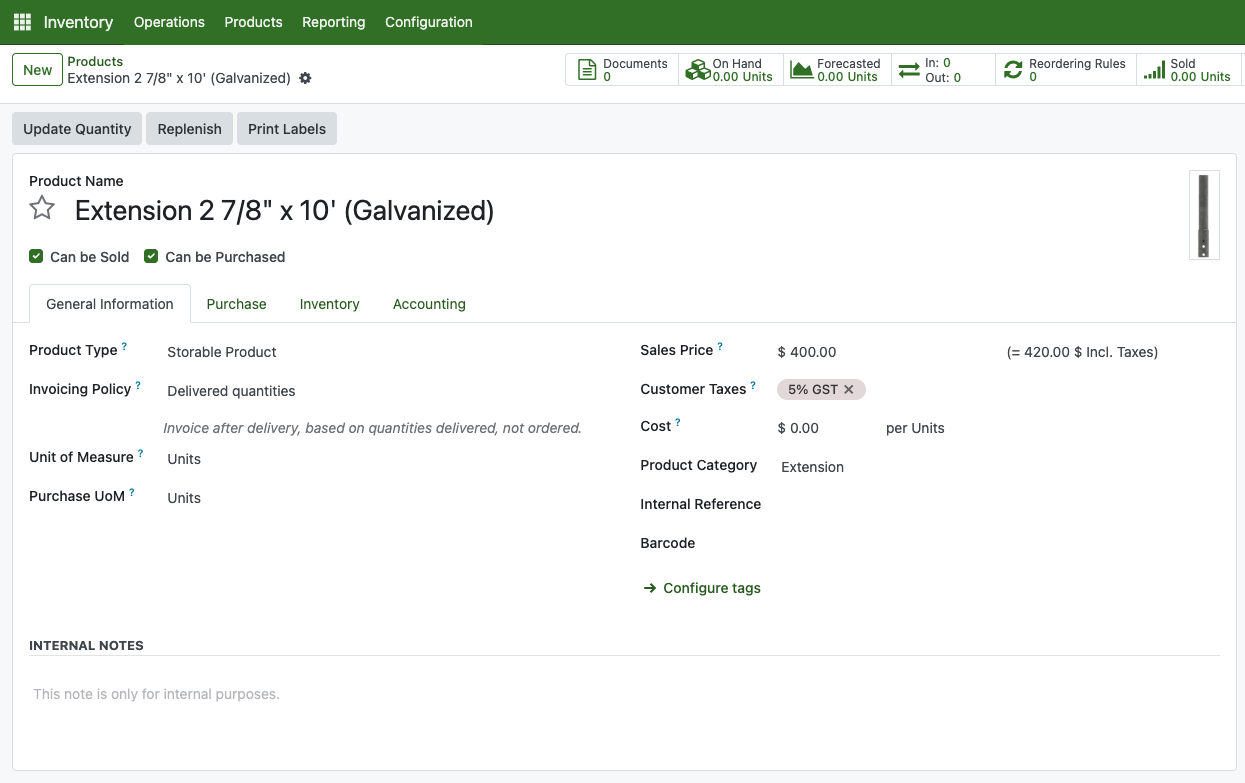
Inside Purchase tab, its recommended to input the vendor name where this product are purchased from.
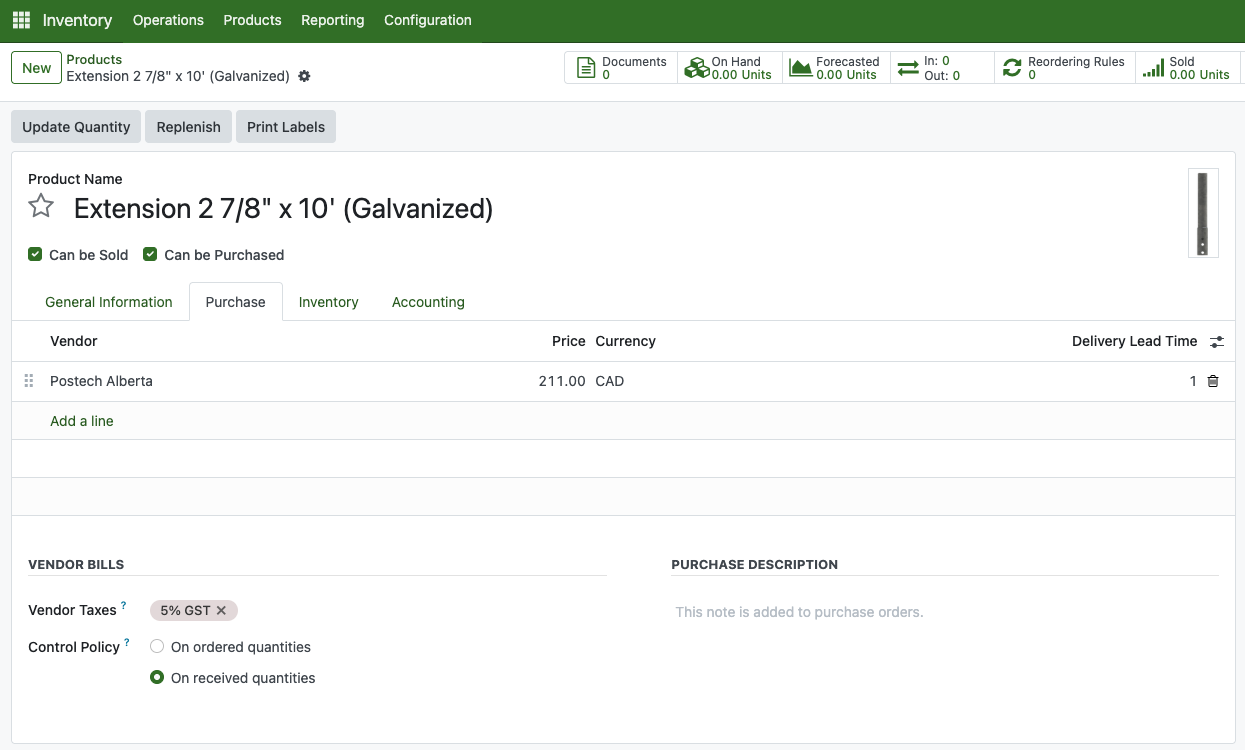
Once all is done, click save.
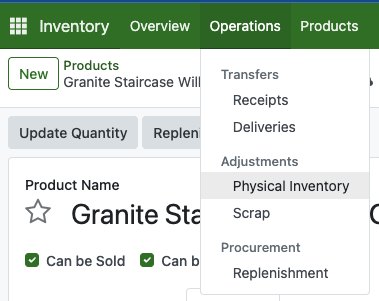
Acquiring stock can be done by purchasing the product or making a physical inventory adjustment. Purchasing means acquiring quantity and, doing physical inventory adjustment meant counting stock that physically available. This step usually do annually to recalculate accuracy between your real-life quantity and the system.
In order to do that, go to Operation > Physical Inventory
Here you can input your product count.
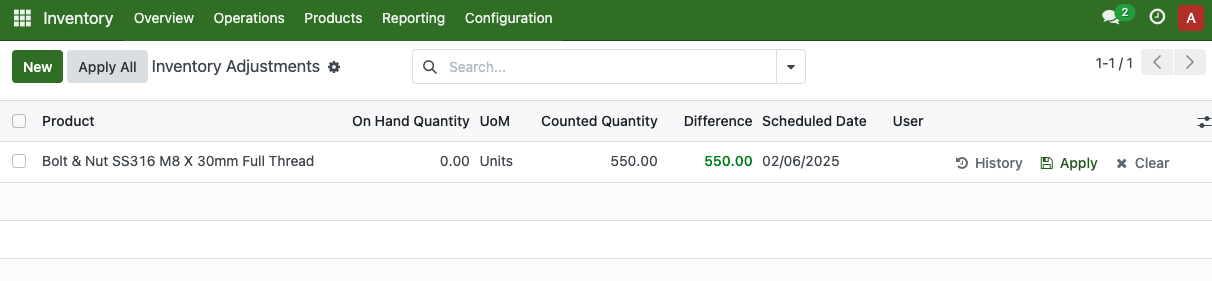
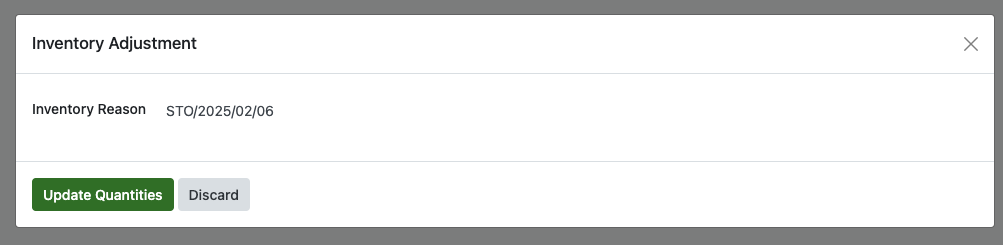
Once it done, click the Apply All button. This pop up will show up and you can fill the reason.
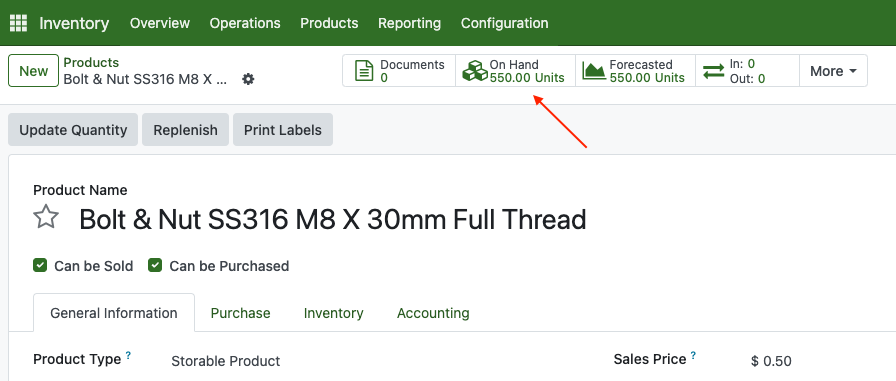
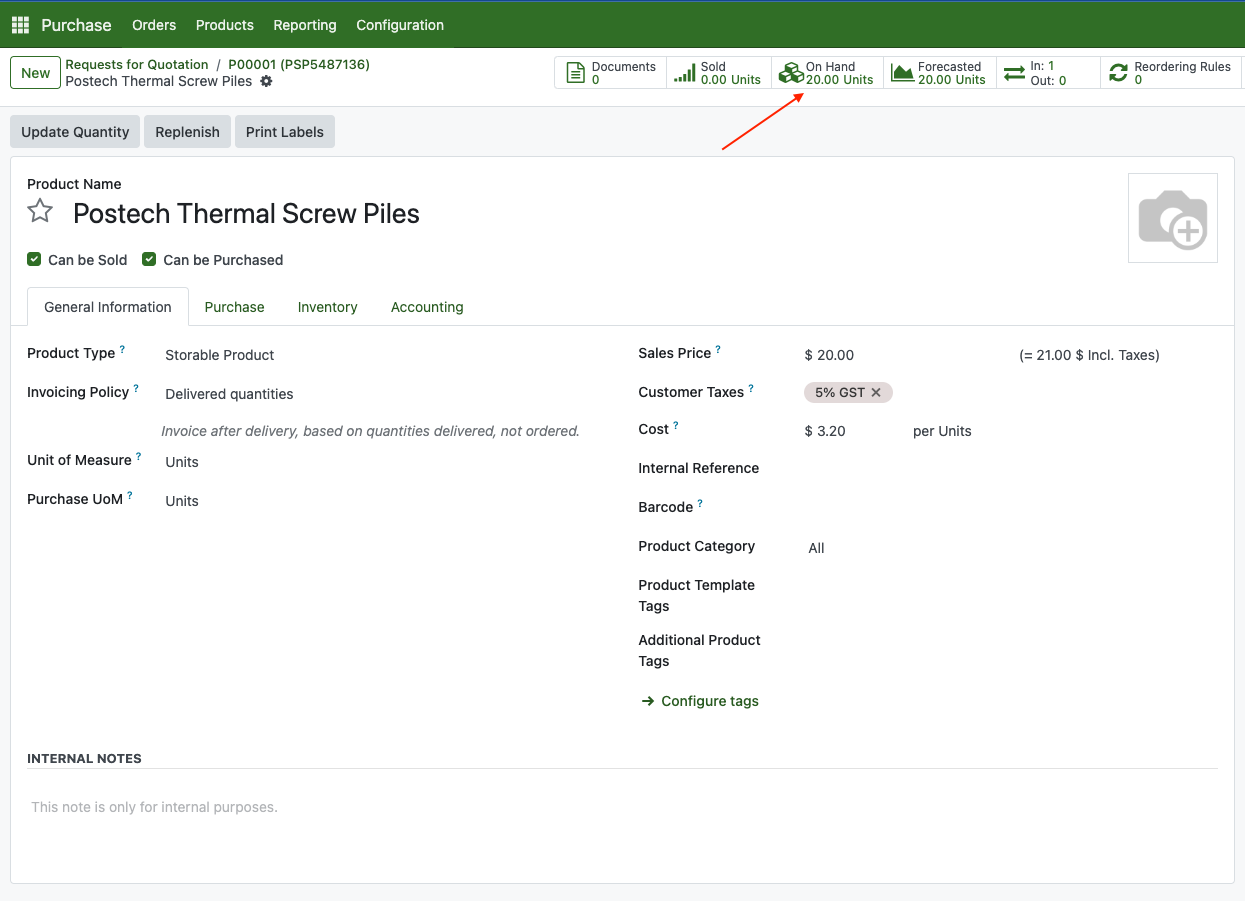
If you go to the product, you can see the On-Hand quantity will show based on how much the quantity is inputted.
Making Purchase Order
Purchase Order needs to be created when we are about to order a goods from vendor.
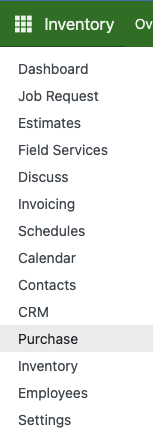
From the main menu, go to Purchase
Enter the vendor name, vendor reference and the currency.
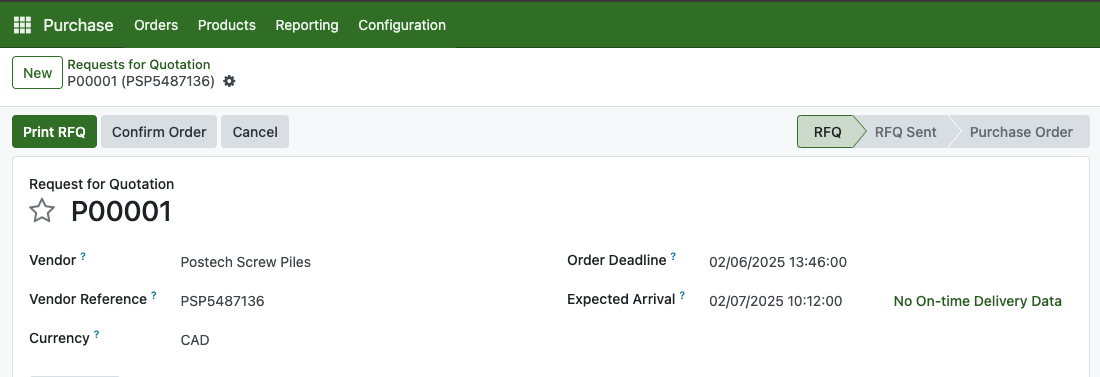
Fill the product and unit price. If you are currently requesting a product price, you can left it zero.
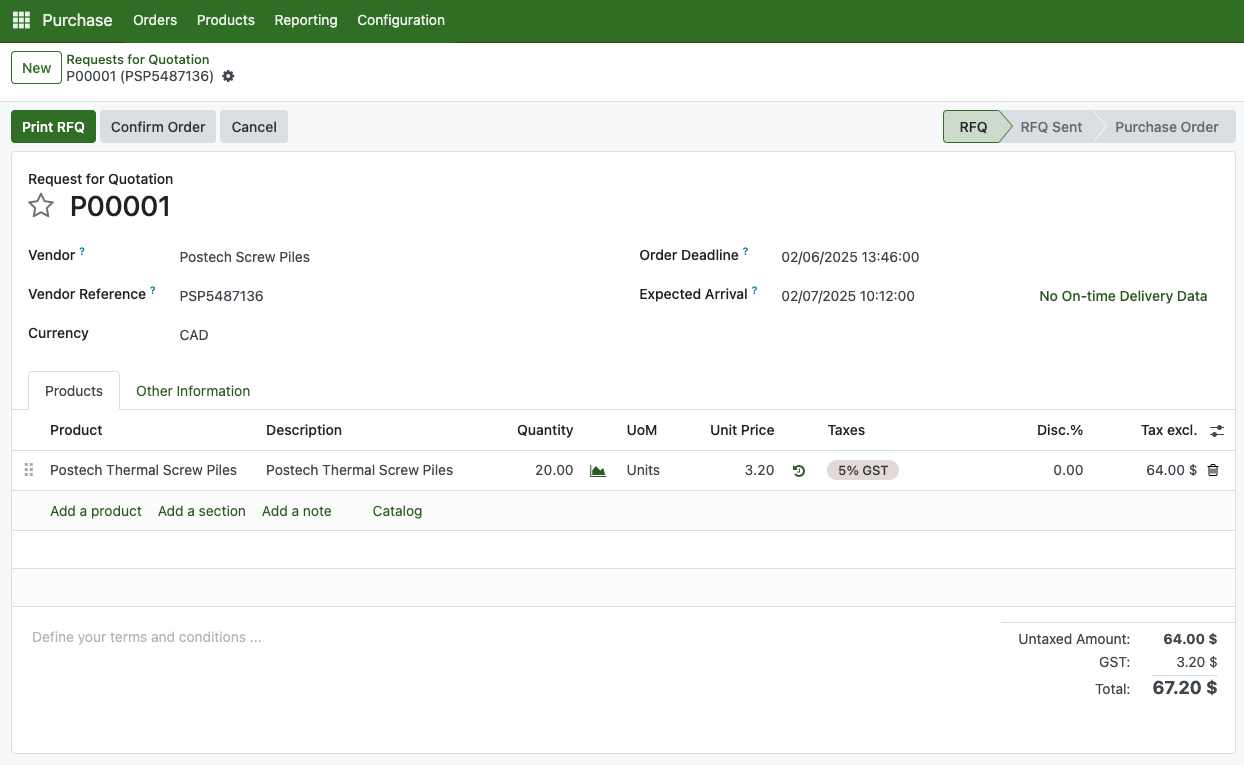
Fill payment term in the Other information tab.
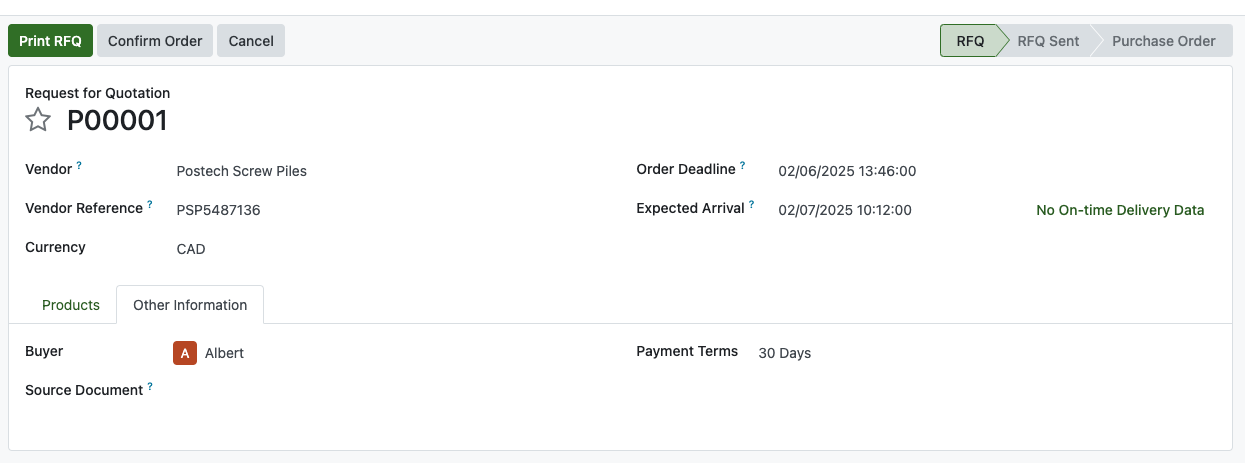
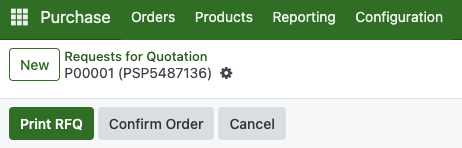
Once all is set, you can send this RFQ through your email or printing the RFQ as .PDF attachment.
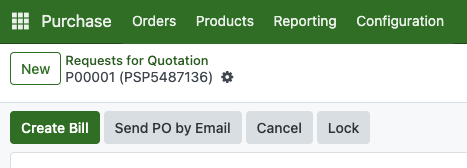
Creating a Purchase Order (PO) is straightforward. You can convert an existing RFQ into a PO by clicking Confirm Order.
Similar to RFQ, you can print this and send it to Vendor as a purchase agreement.
After converting an RFQ into a PO, a Receive Products icon will appear on the related record. Click this button to open the receiving order.
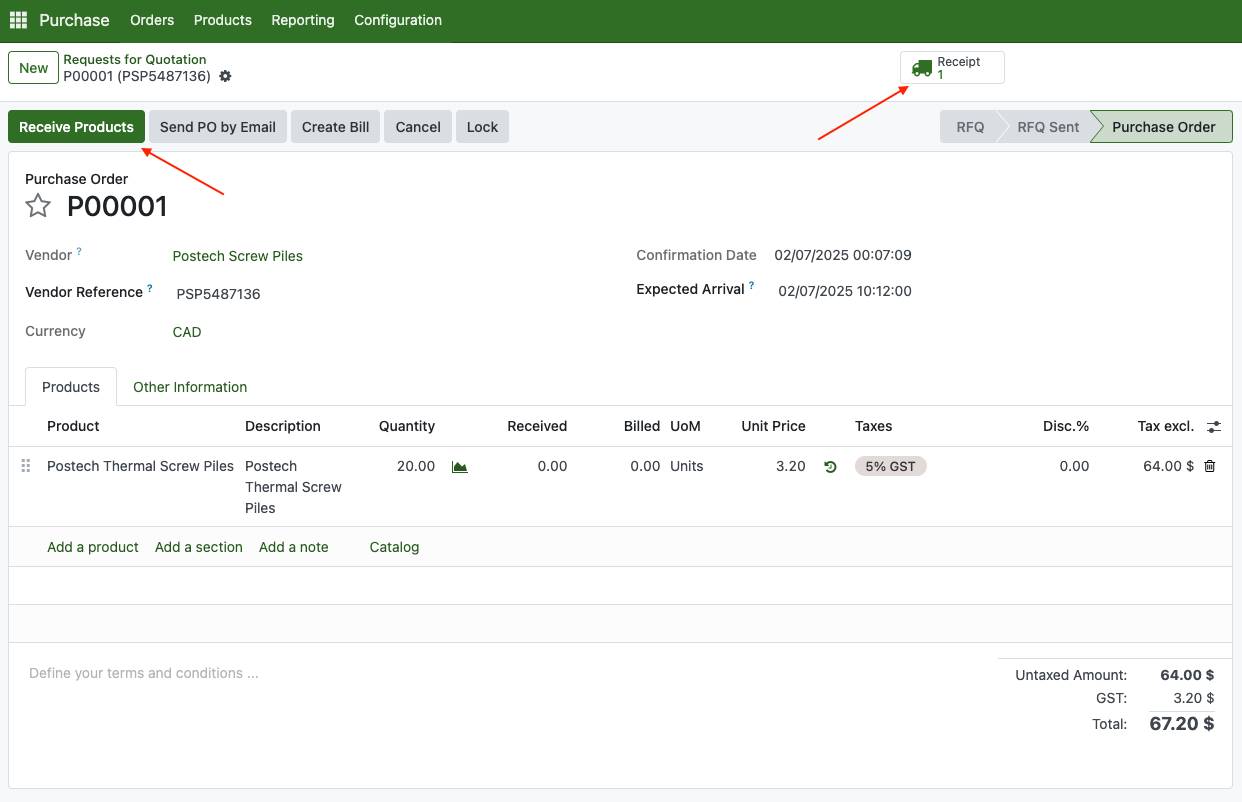
This is the receiving order. If you’re receiving only part of the order, simply adjust the quantities and click Validate. If everything matches the delivery, just click Validate to confirm receipt.
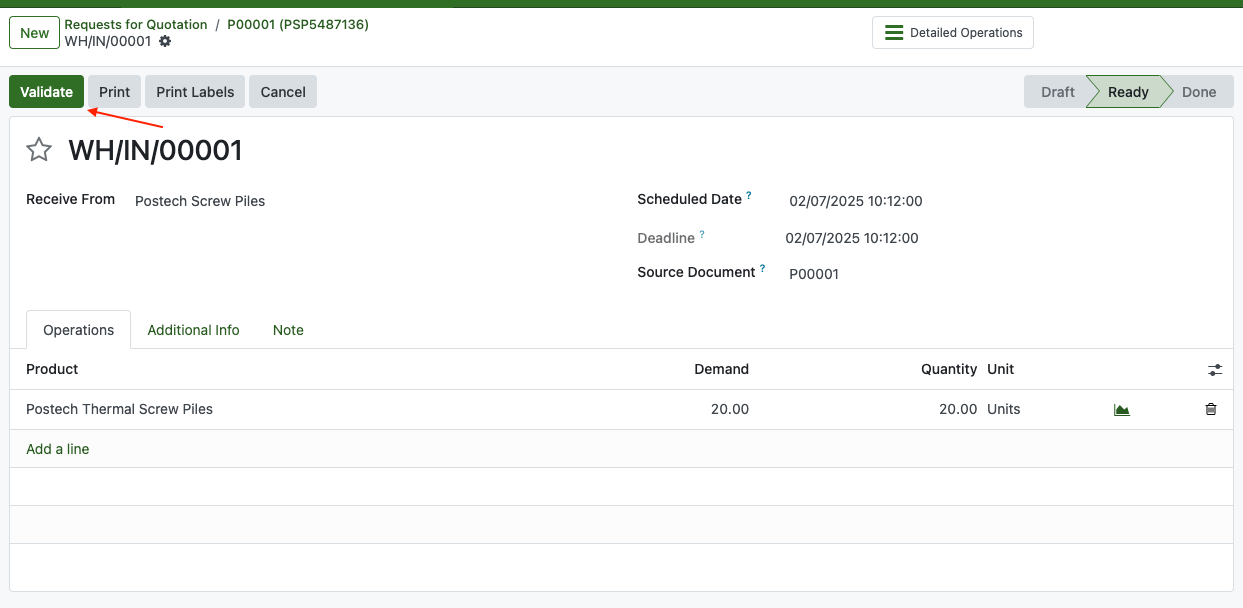
Now, the product is available inside inventory.
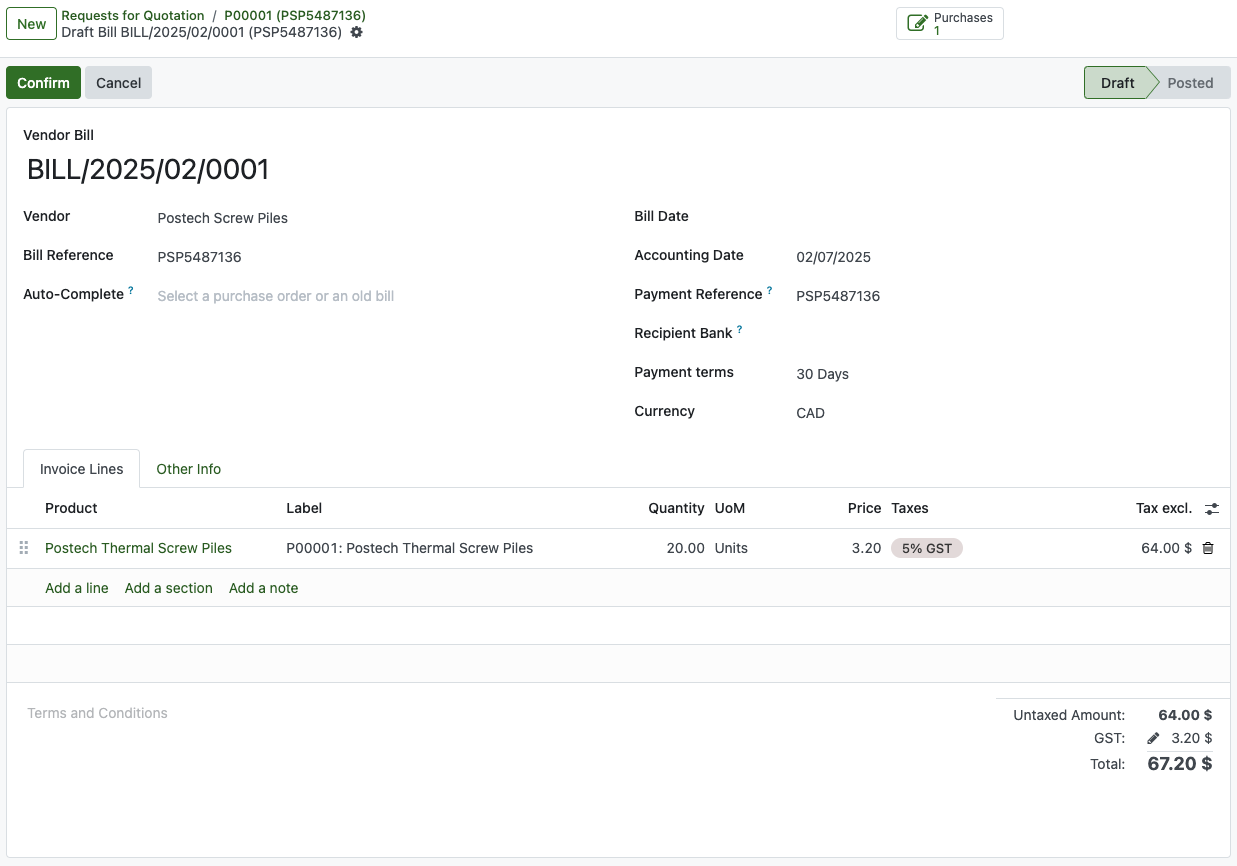
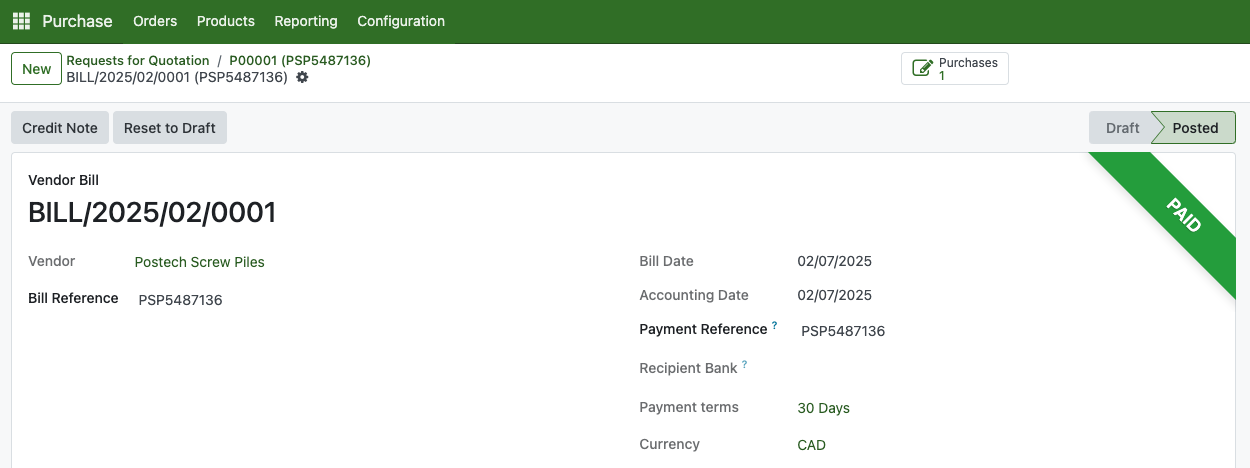
After receiving the products, you need to create a payment for the vendor. This process is called Creating a Vendor Bill. Go to the Purchase Order (PO) and click the Create Bill button in the header.
You will be redirected to a new record called Vendor Bill. Set the Bill Date, and then click Confirm.
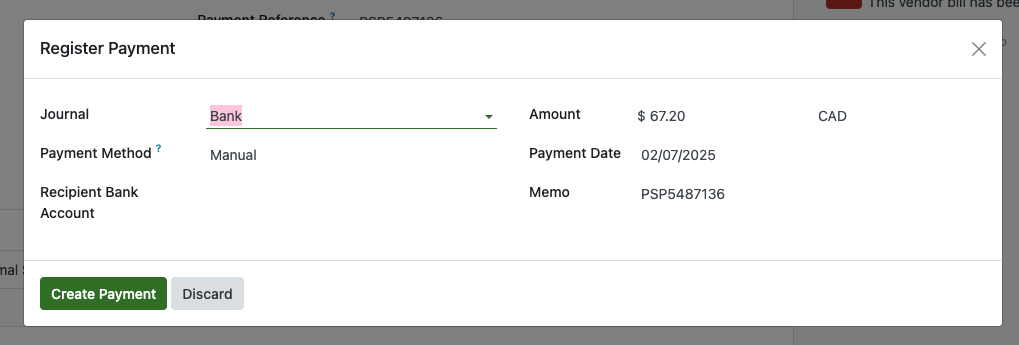
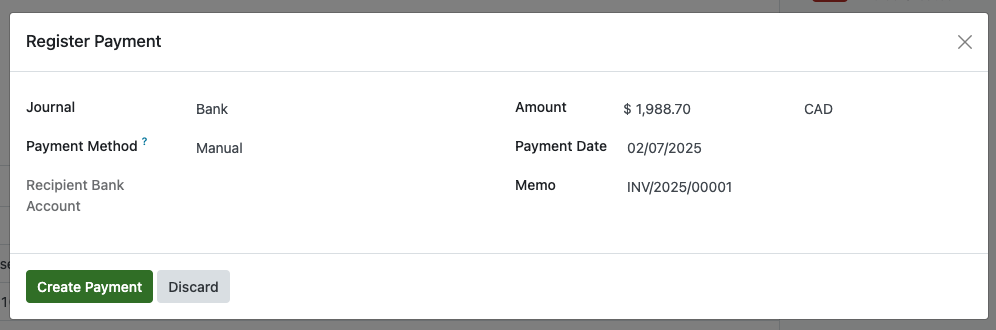
Click on register payment button.
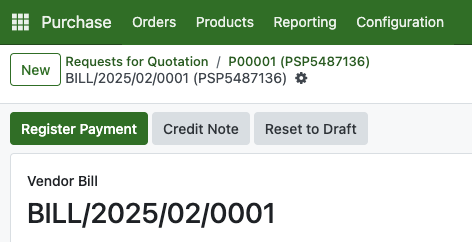
Fill all the requirements needed here, and then click Create Payment.
A “Paid” ribbon will appear on the related bill once the payment is completed.
Making Job Request
Job Requests is where all customer requests are collected. Here, you can add the schedule and job details based on the customer’s requirements.
From the menu navigation, go to Job Request
Create a new One
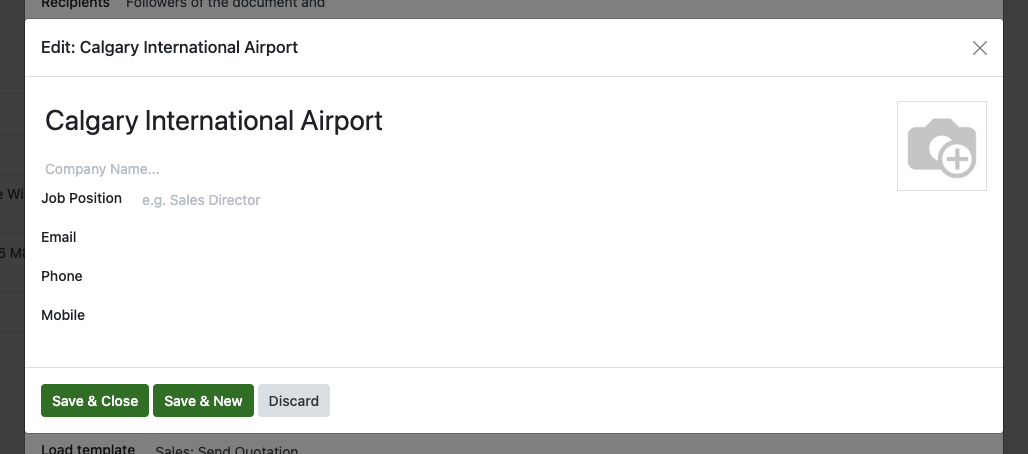
Enter the customer’s name. If the customer is not yet registered, you can create a new one on the spot by clicking Create or Create and Edit to add more details such as address, city, postal code, and more.
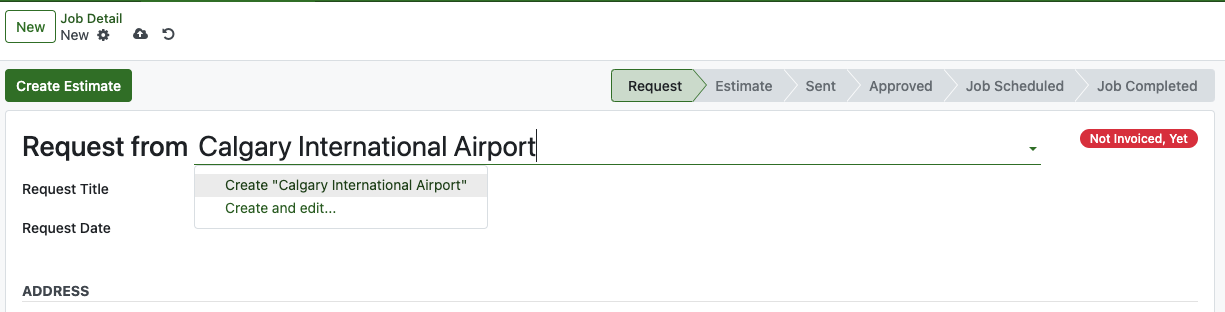
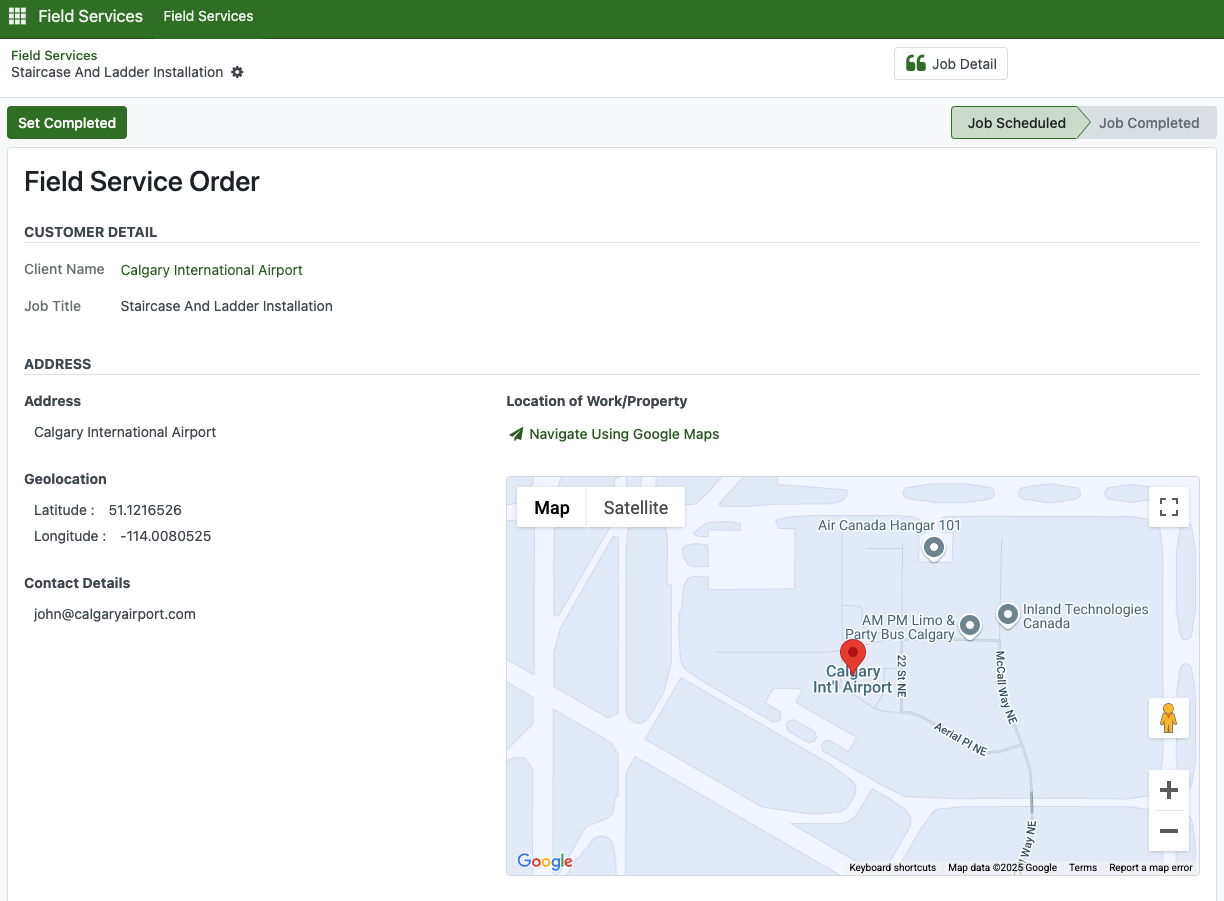
Once a customer is selected, their address and contact information will appear based on the details entered in the customer record. If no customer information is available, only basic details like the customer’s name will be shown. This information is also used to display the location on the map within the interface.
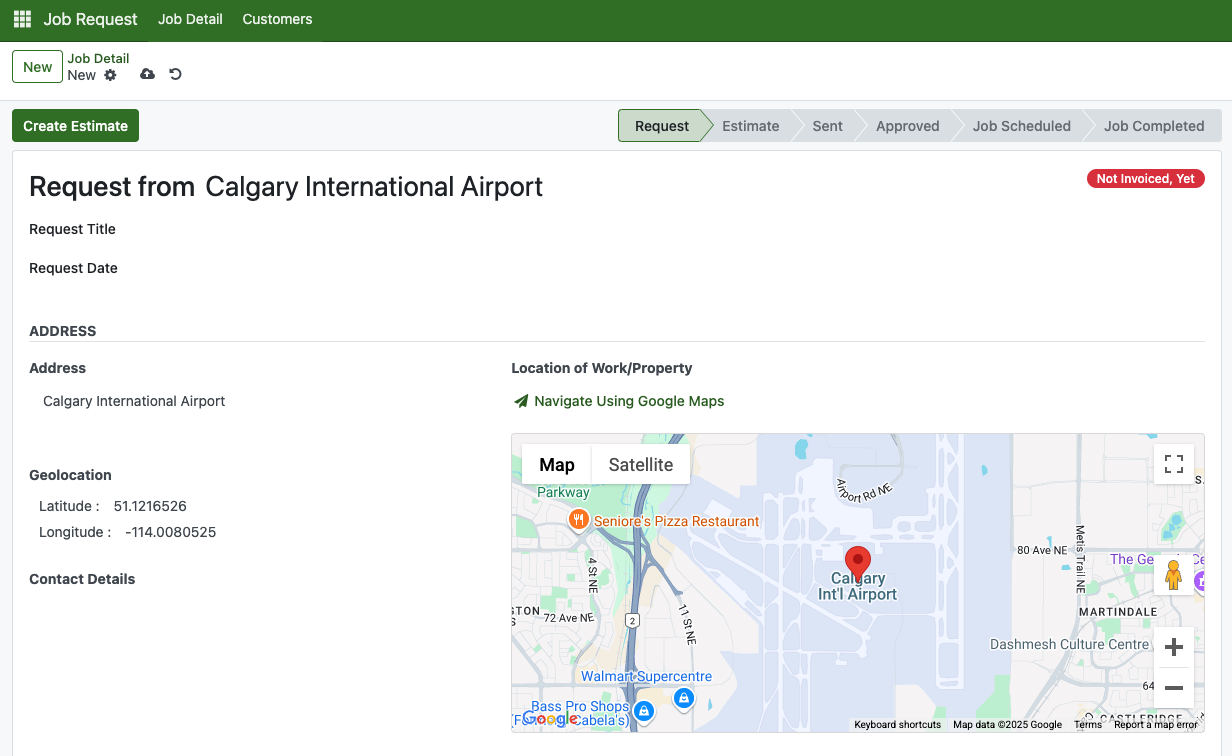
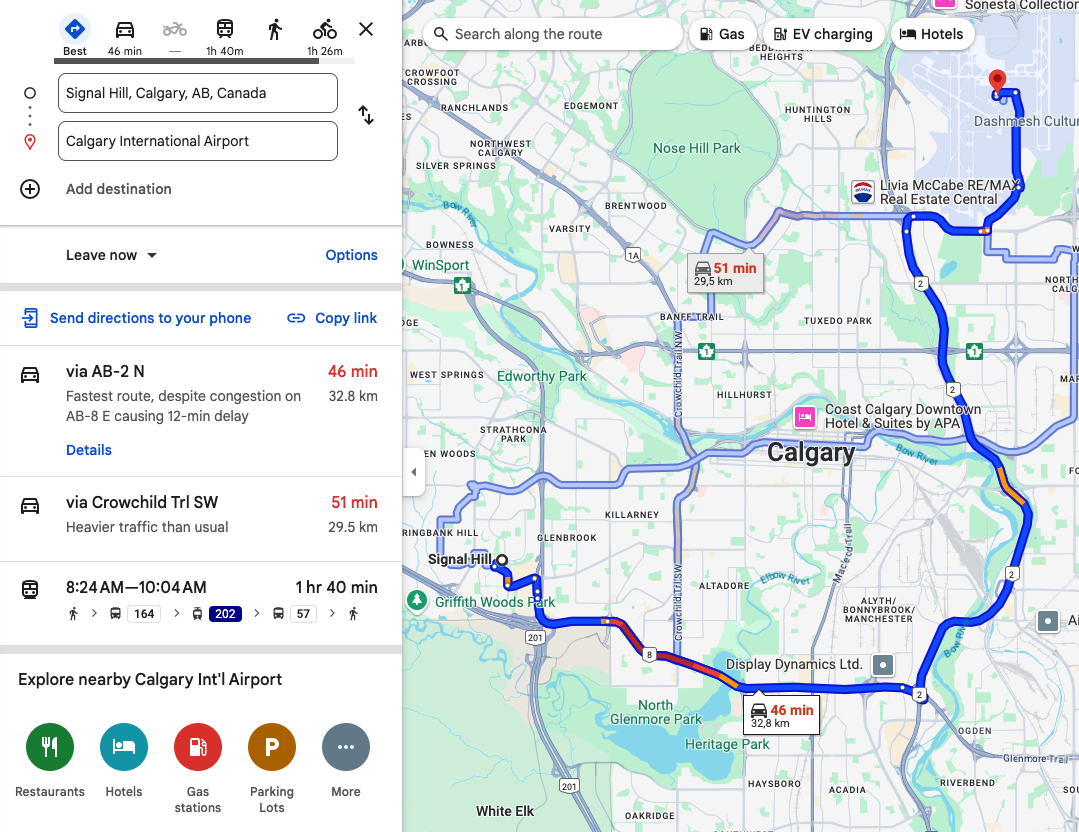
Click Navigate Using Google Maps to see the route from your current location to the destination. A new tab will open with the directions if you are operating from PC.
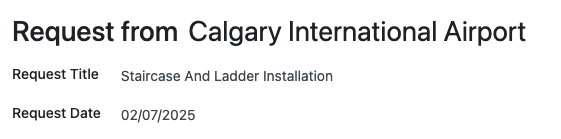
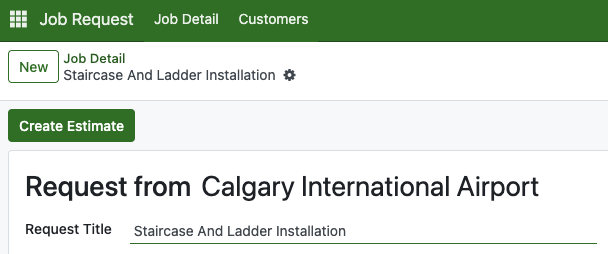
Input more information such as the request title and request date.
Put information on the job detail.

If an initial site visit is required, you can schedule a Pre-Job by activating the toggle button. Enter the visit date, any notes, and assign the team member responsible for the visit.
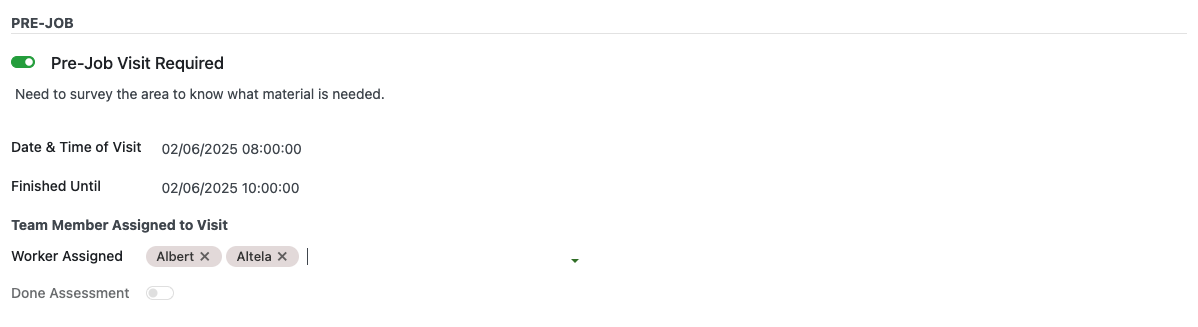
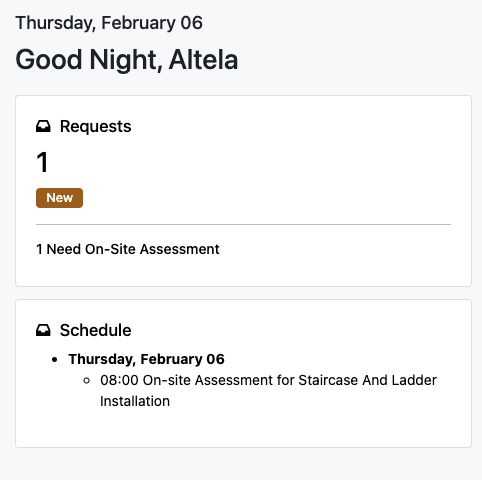
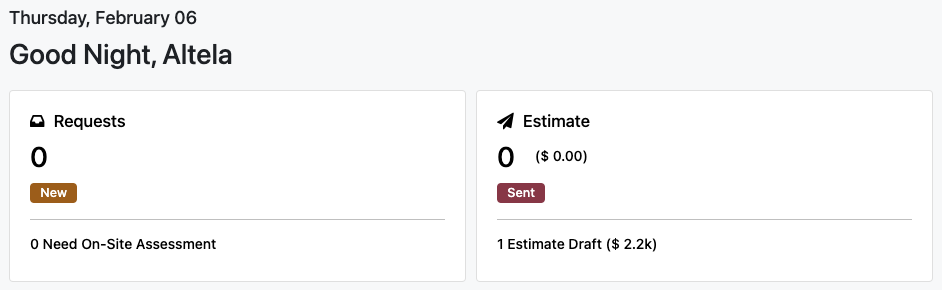
Once you save this record using the Save button at the top, all tagged team members will have the task added to their schedule. They can view it on their own dashboard, along with the total number of requests and how many require on-site assessments. If they cannot see it, please check the user’s permissions in the Managing Users section of the documentation.
When you click on a schedule, you’ll be taken to the calendar view where all assigned activities are displayed. Click on an activity to open a pop-up, then click the Job Request Reference to see the details. You can also mark it as Done once the task is completed.
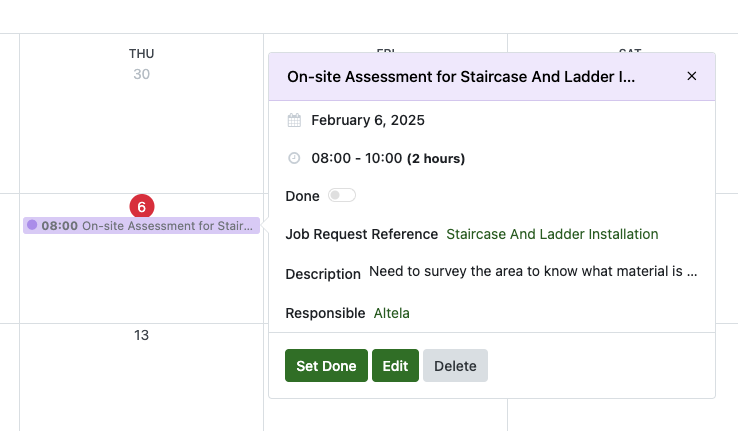
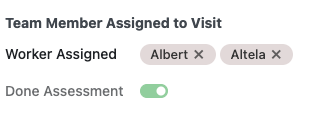
Once a schedule is marked as done, it will disappear from the dashboard, and the corresponding pre-job activity will be marked as Done.
Scroll down to the bottom and you will see Work Day Section and Required Product/Services.
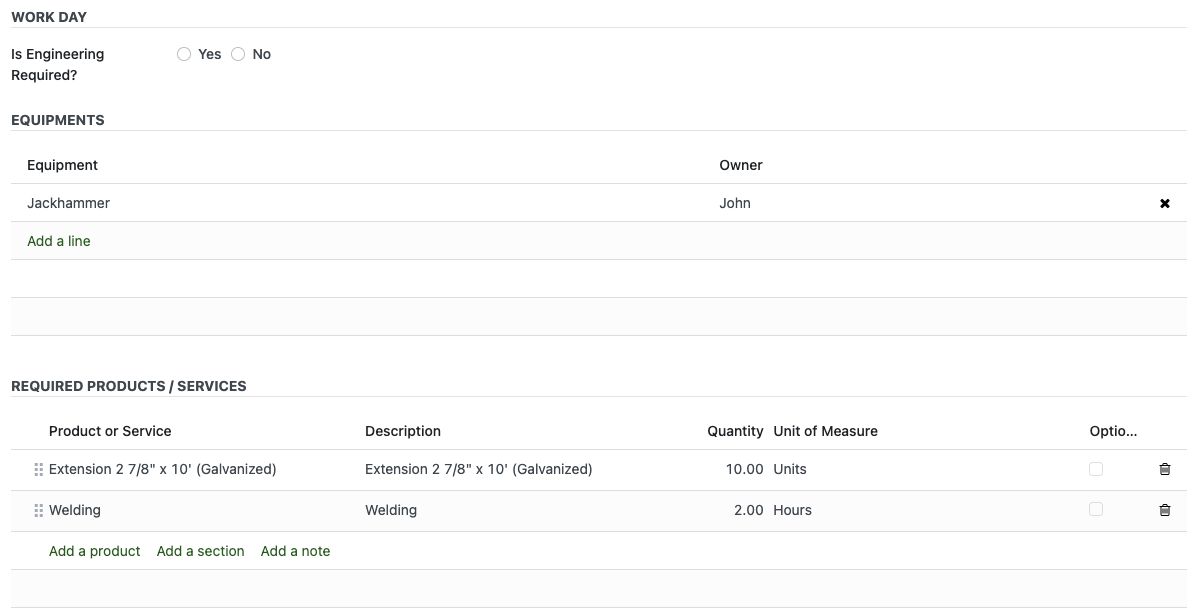
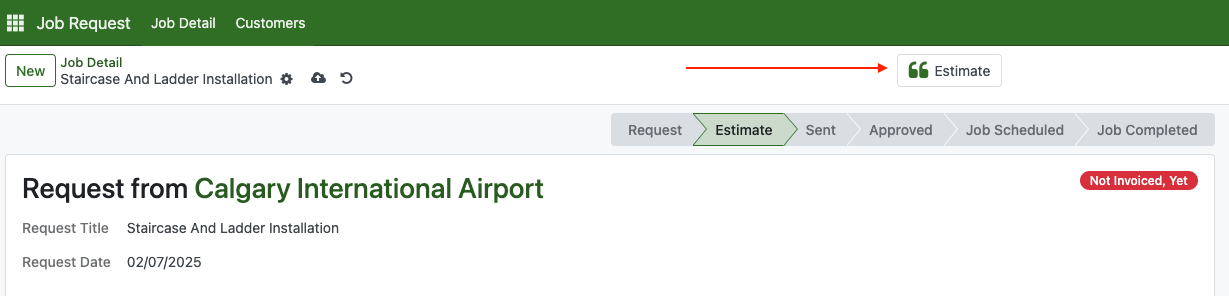
Now the Job Request is completed.
Click the Create Estimate button to generate a new estimate.
You will be automatically redirected to the newly created estimate record. If not, a button will appear that you can click to go to it.
At this point, the product’s status on the dashboard will move to the Estimate section. Since the estimate is still in draft, it will appear under the Estimate Draft button.
Create Estimates
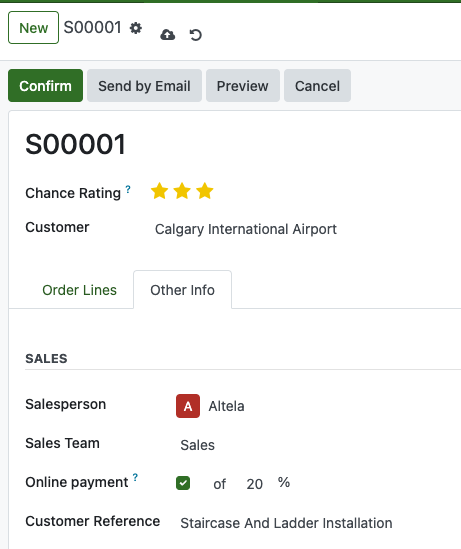
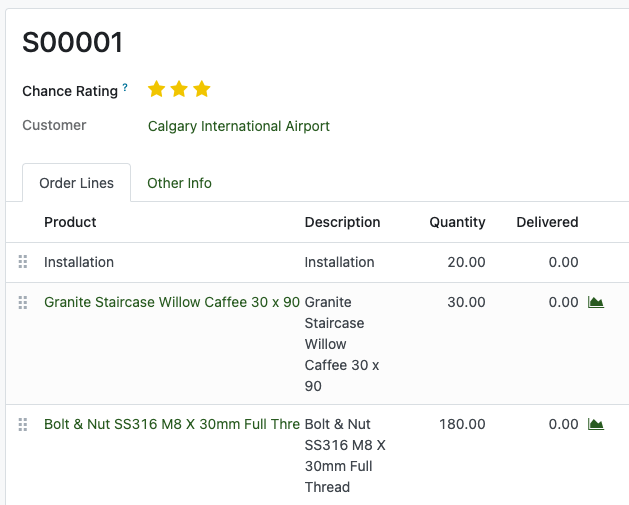
Inside the estimate, you can fill in your price to customer.
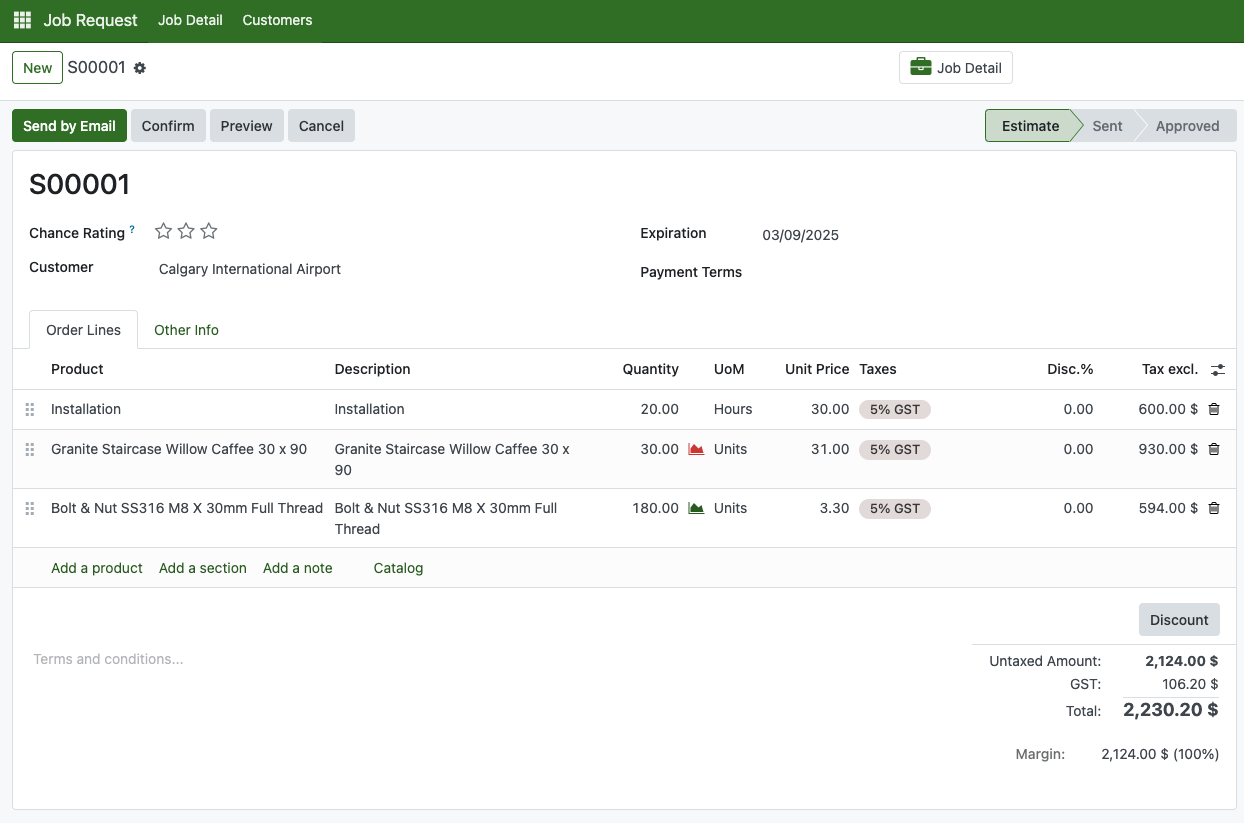
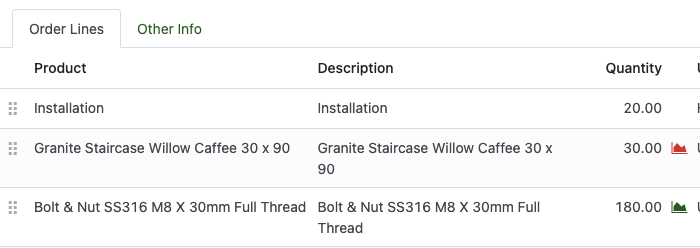
The red mark beside quantity means the product is less than or not available in your inventory, and the green means it is available.
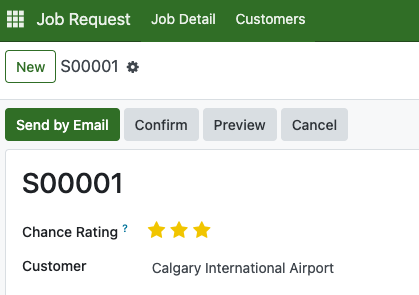
At the top, you’ll see three stars called the Chance Rating. This indicates how confident you are that the estimate will close the deal. If you select three stars, once the estimate is validated, any unavailable products will be automatically ordered from the assigned vendor.
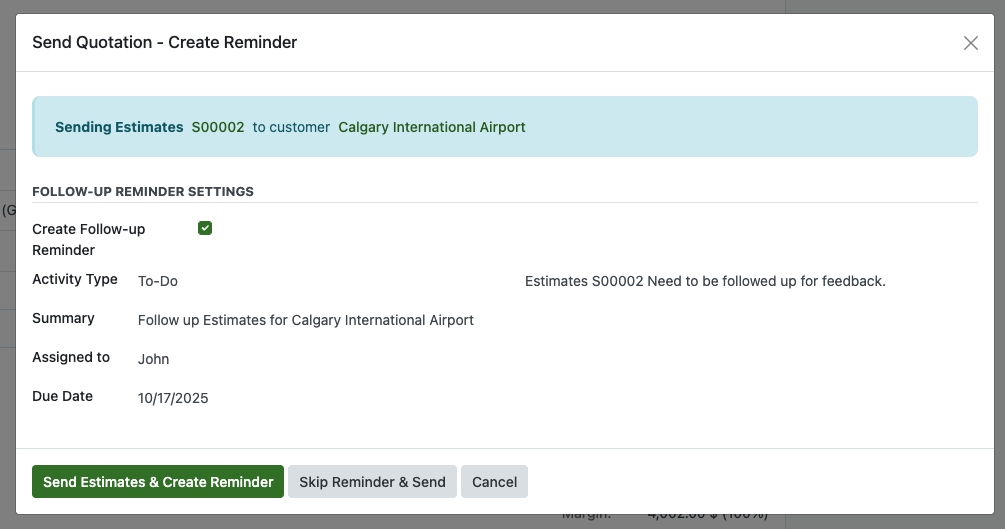
Once everything is ready, you can send the estimate to the customer by email through "Send by Email" button.
A Send Quotation Reminder pop-up will appear. This pop-up allows you to set a follow-up reminder after sending the email, but it is optional and can be skipped if you don’t need it.

Our platform also allows customers to pay in installments for an order. It is recommended to enable and activate the Stripe payment gateway first. Once Stripe is set up, go to the Sales Order, click on the Other Info tab, and check Online Payment. Here, you can set the amount or percentage the customer should pay.
When you sending the sales order via email, there's a link that leads them this view. They will be able to click Accept & Pay button online.
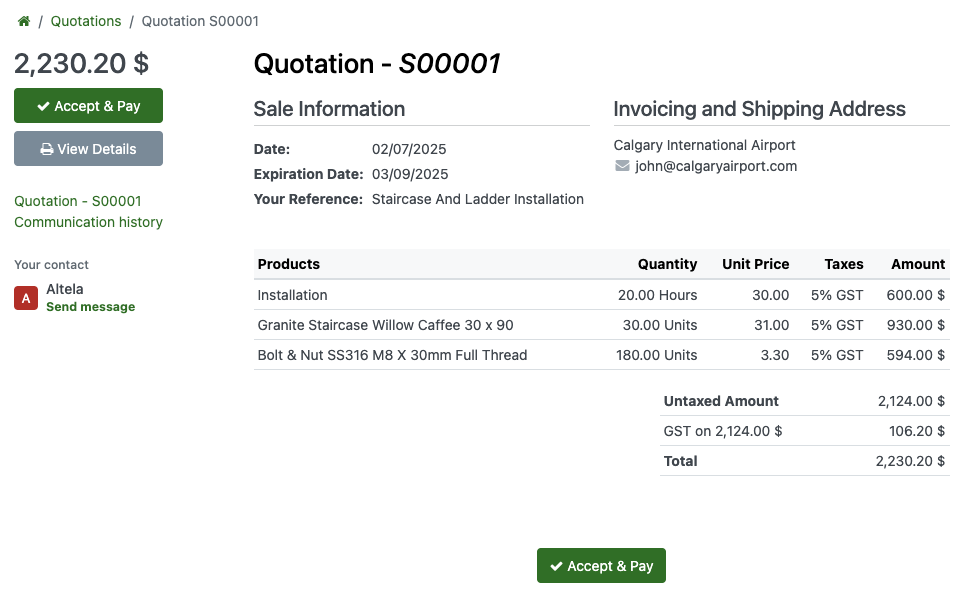
Once they paid, the estimate state will become approved.

There is also a purchase order that is generated automatically because lack of quantity. You can check that Purchase Order, inform your vendor, and once the product has arrived you can validate it.
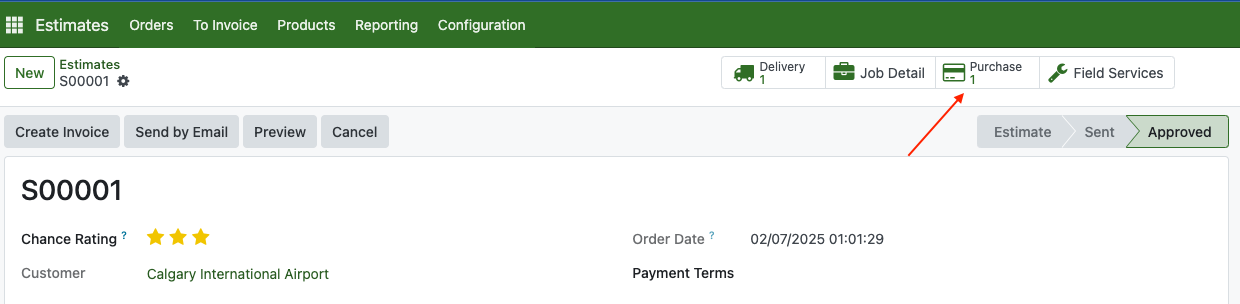
When all product is ready, the icon qty will turn green.
Now we need to go to the next step which is working with Field Service.
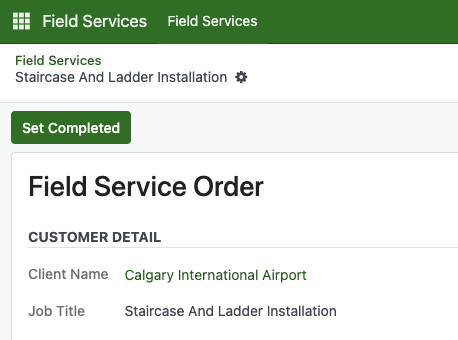
Processing Field Service
Field Service is a record that contains all activities related to ongoing work, including tasks that need to be completed.
From main menu, click on Field Services
Open one of the record
Inside Required Products/Services, fill in the Quantity

After that, fill in the planning section

Also fill in the Quality Control Checklist

Once all done, click Set Completed. The Delivered product will later decreased from overall stock as well.
Billing Invoice To Customer
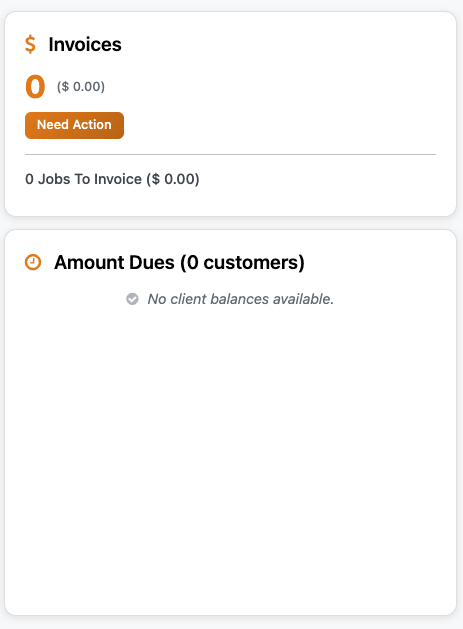
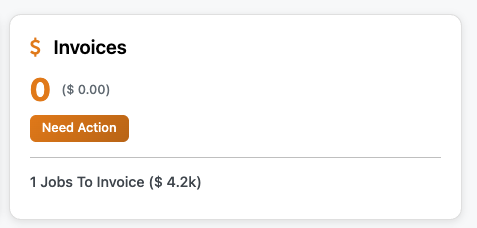
When a Field Service is validated, the Jobs to Invoice status will appear on your dashboard. Click to open lists of all the job that needs to be invoiced
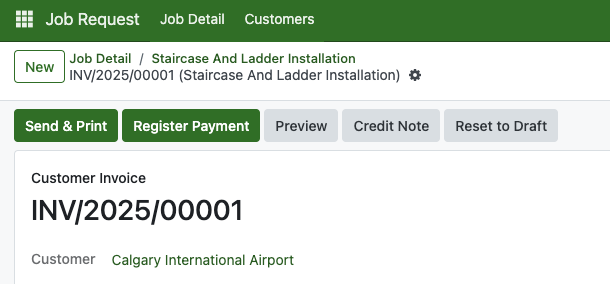
Open the related estimate and click the Create Invoice button to generate the invoice. Please review the invoice accordingly.

Once created, the customer’s outstanding payments will be listed on the dashboard, showing the remaining amount due.

To send an invoice, click the Send & Print button. If the Stripe payment gateway is enabled, customers can pay the invoice online. Any previous installment payments will be reflected in the Total Amount section.
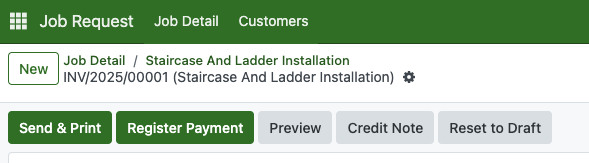
Click the Send & Print button to send an invoice. If the Stripe payment gateway is enabled, customers can pay online. Any prior installment payments will be reflected in the Total Amount section.
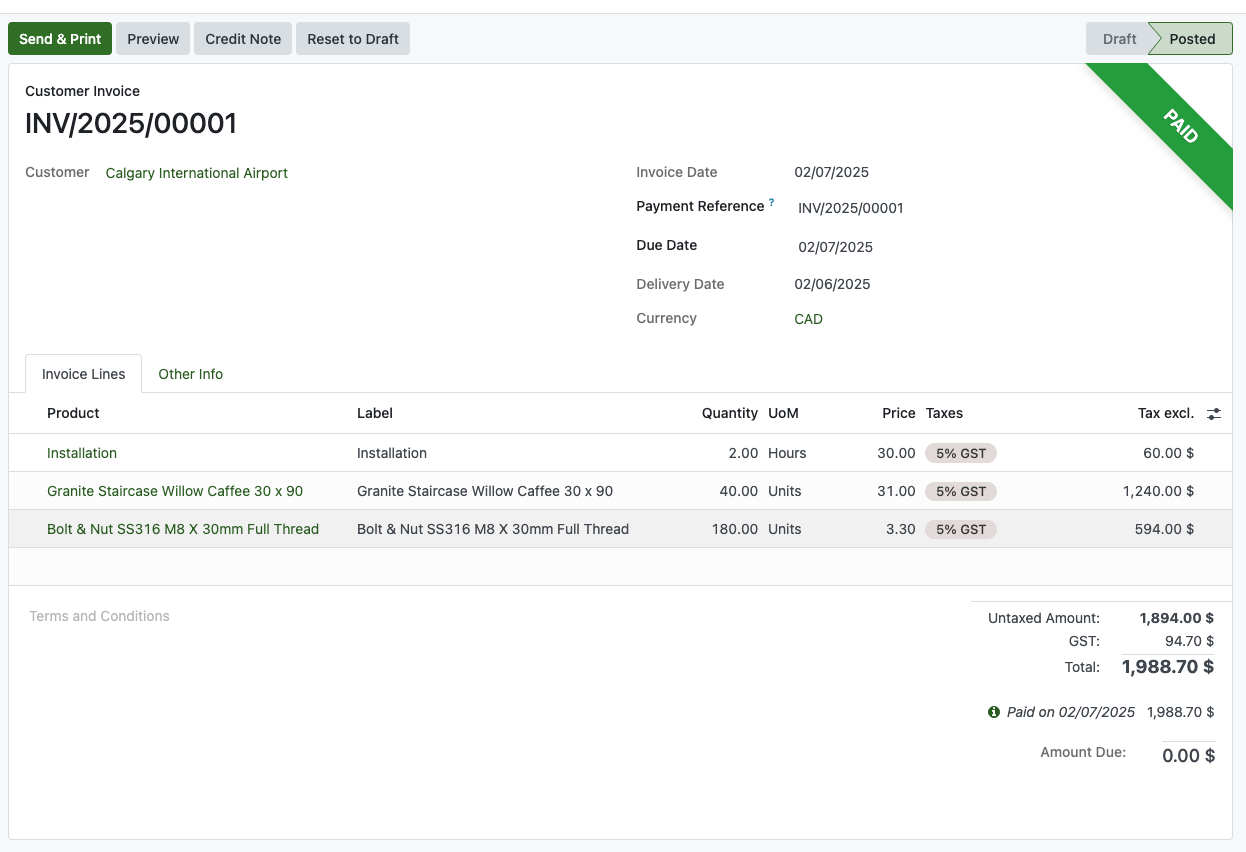
Enter the full payment amount and the payment date. If the customer is paying partially, enter the exact amount they are sending. Then, click Create Payment to continue.
Once the invoice is paid, the ribbon "Paid" will appear.
And the payment due will also removed from the dashboard as well.